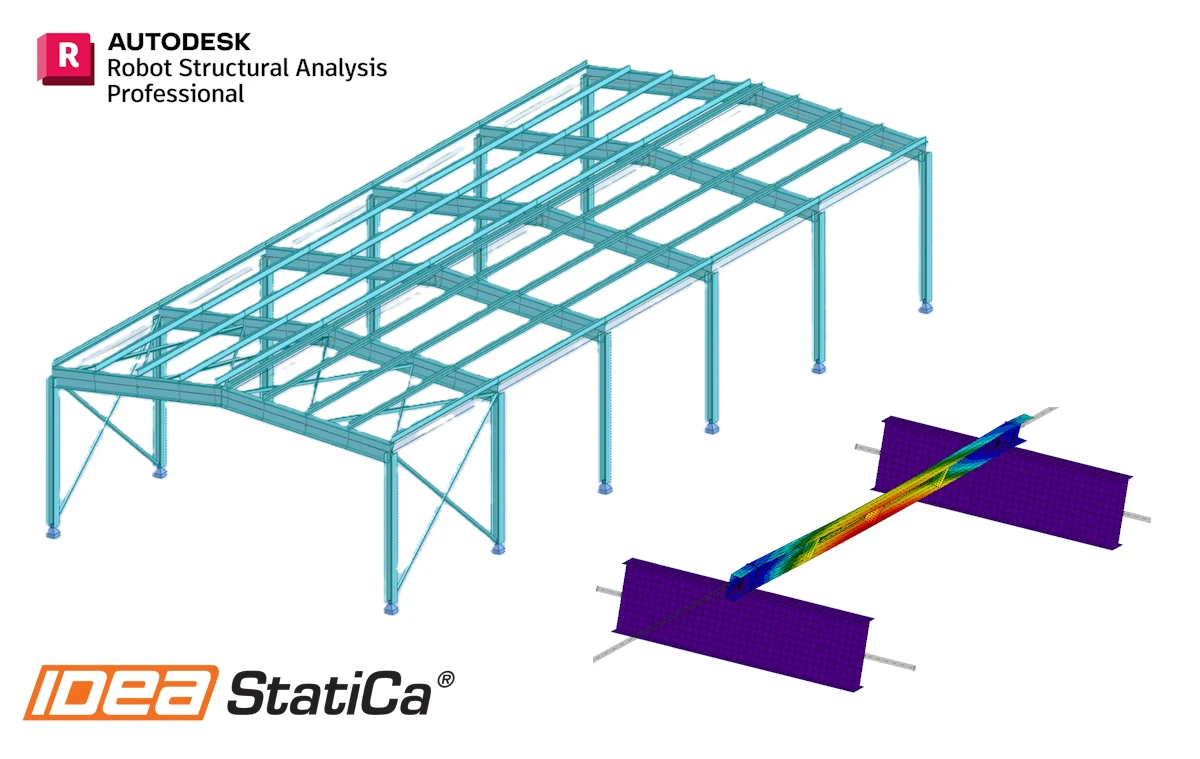


How to activate the link
- Download and install the latest version of IDEA StatiCa
- Make sure that you are using a supported version of your FEA solution
IDEA StatiCa integrates BIM links into your FEA software during its installation. You can check the status and eventually integrate more BIM links by running IDEA StatiCa and opening the BIM links. Please note that some FEA software require additional steps to fully activate their BIM link to IDEA StatiCa.
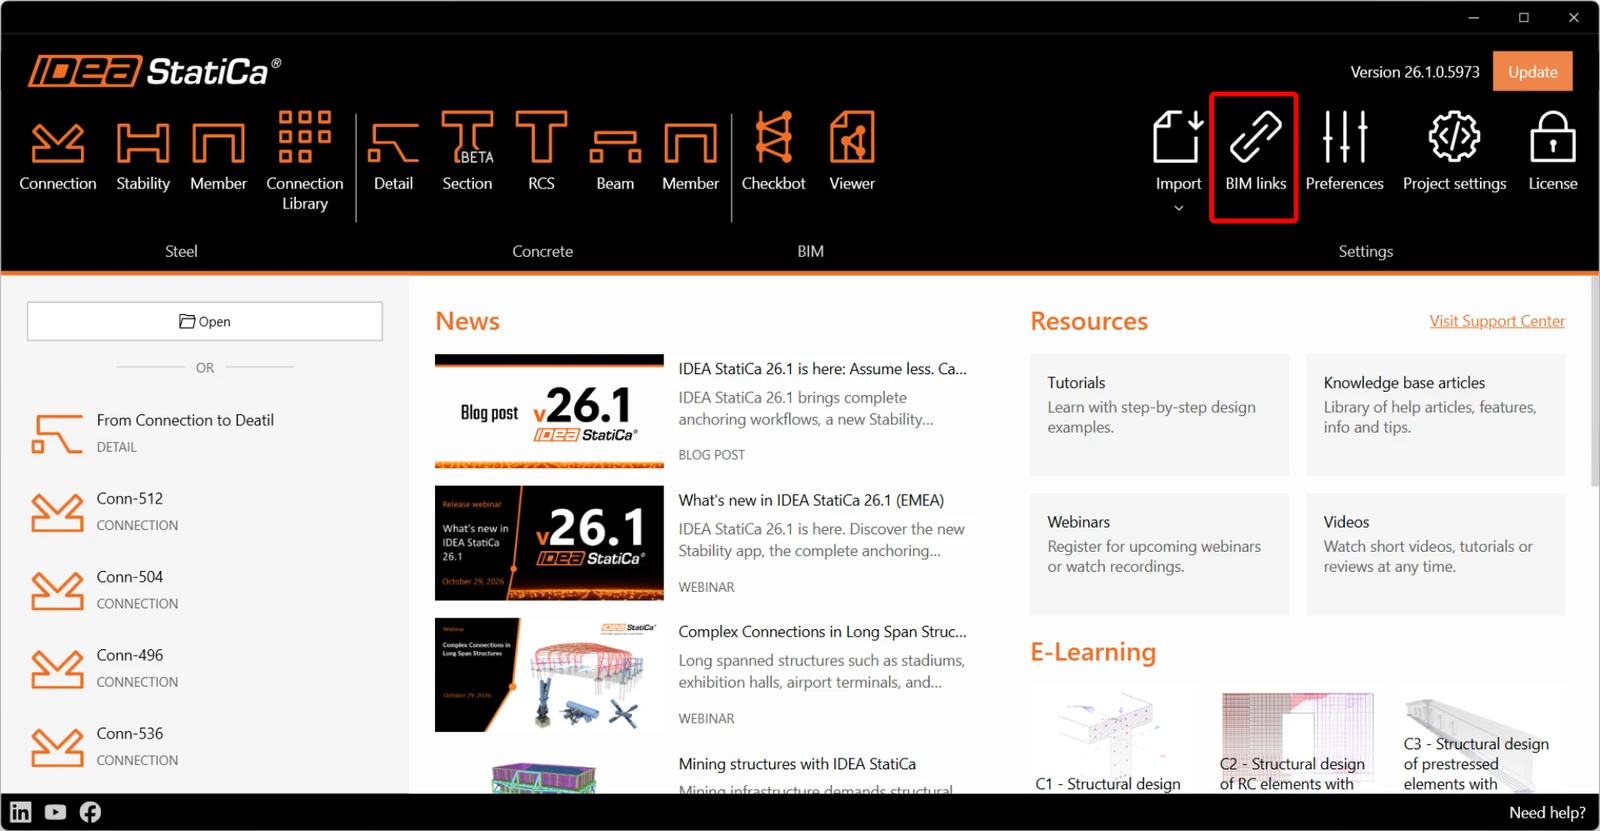
A notification "Do you want to allow this app to make changes to your device?" may appear, if so, please confirm with the Yes button.
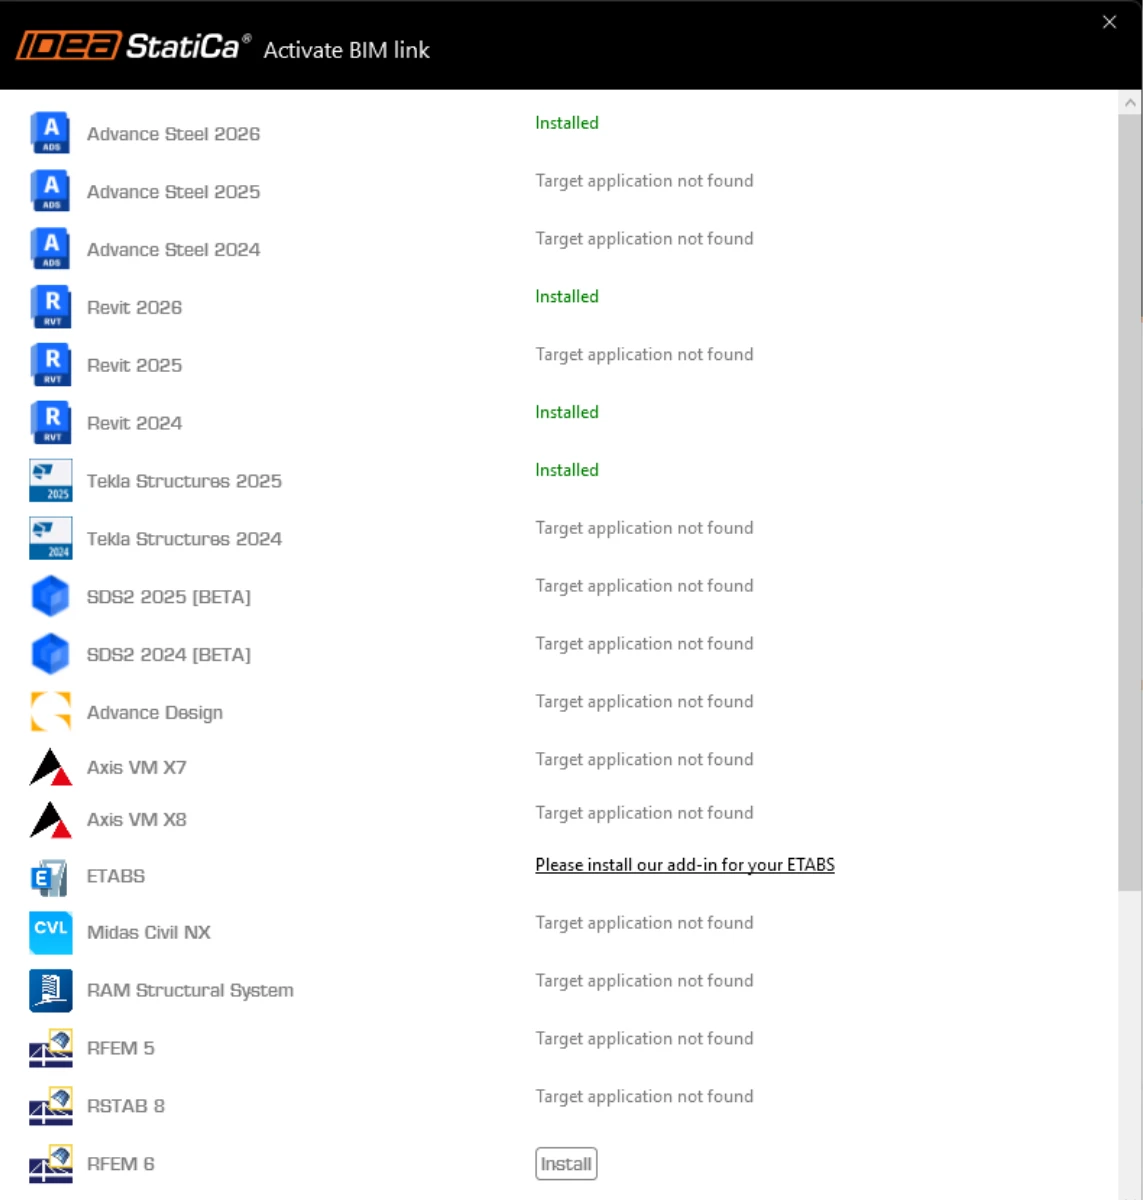
By clicking Install, the BIM link for the selected software is integrated. The screen also tells you the status of other BIM links.
How to use the link
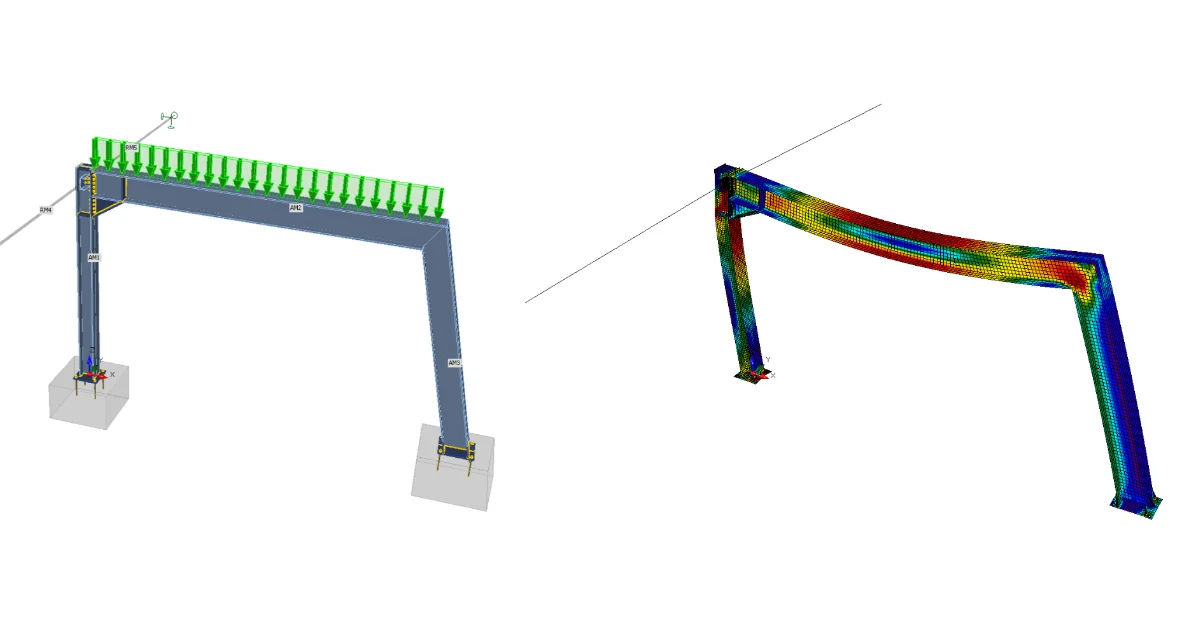
Download the attached project, open it in Robot Structural Analysis, and run the calculation to get the internal forces over the structure.
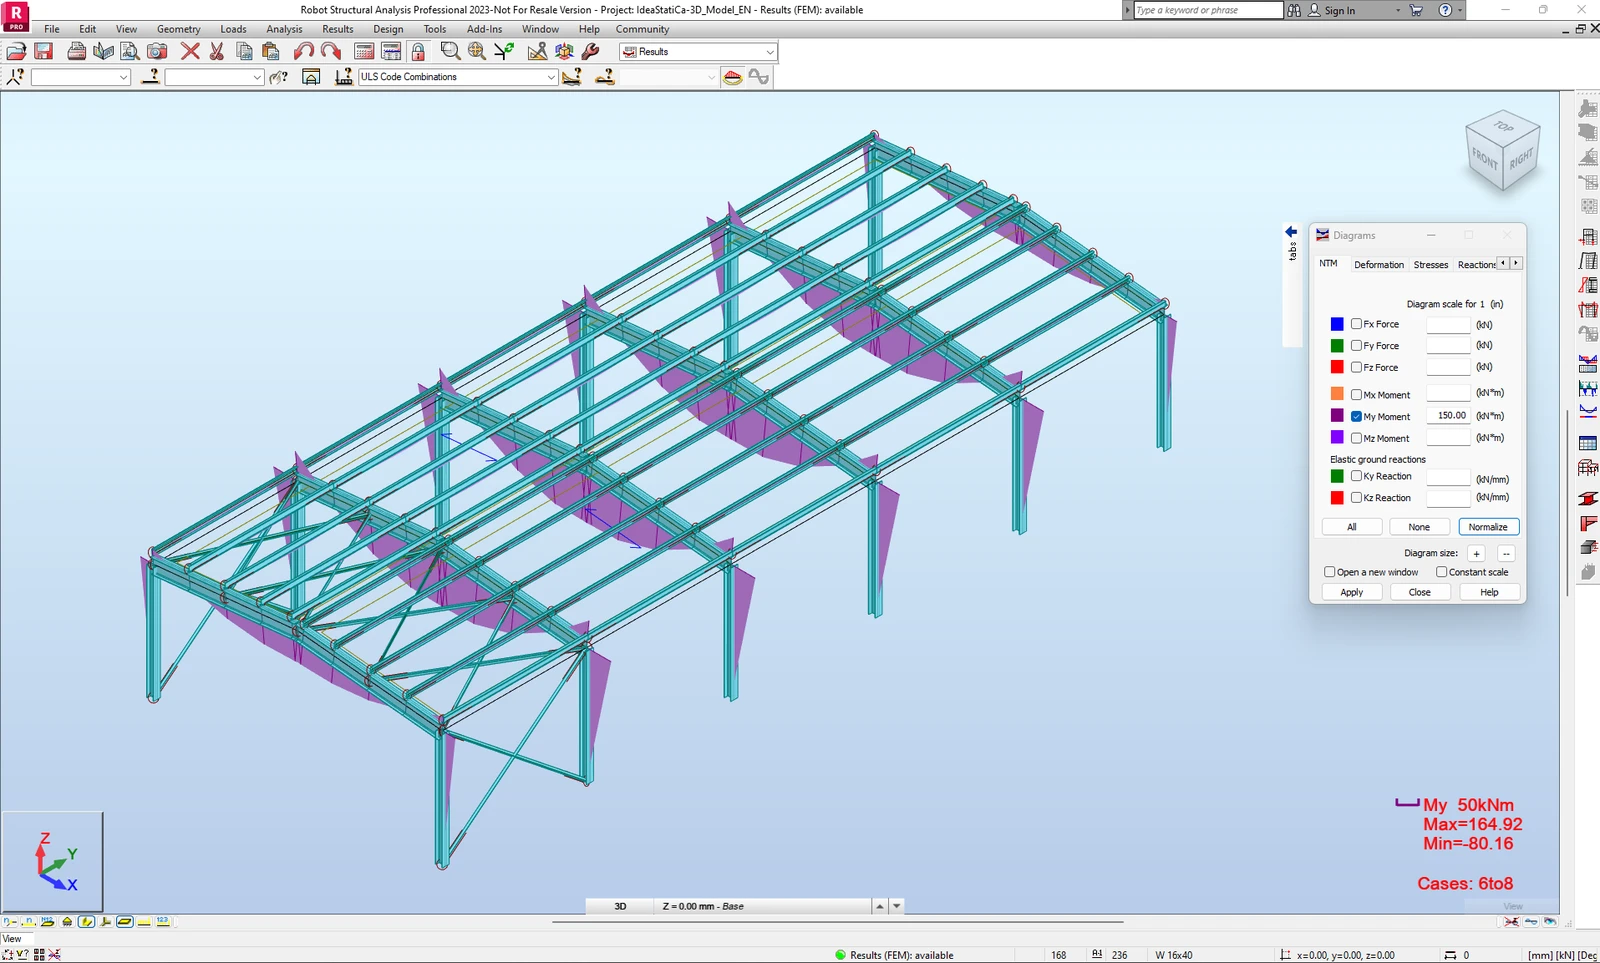
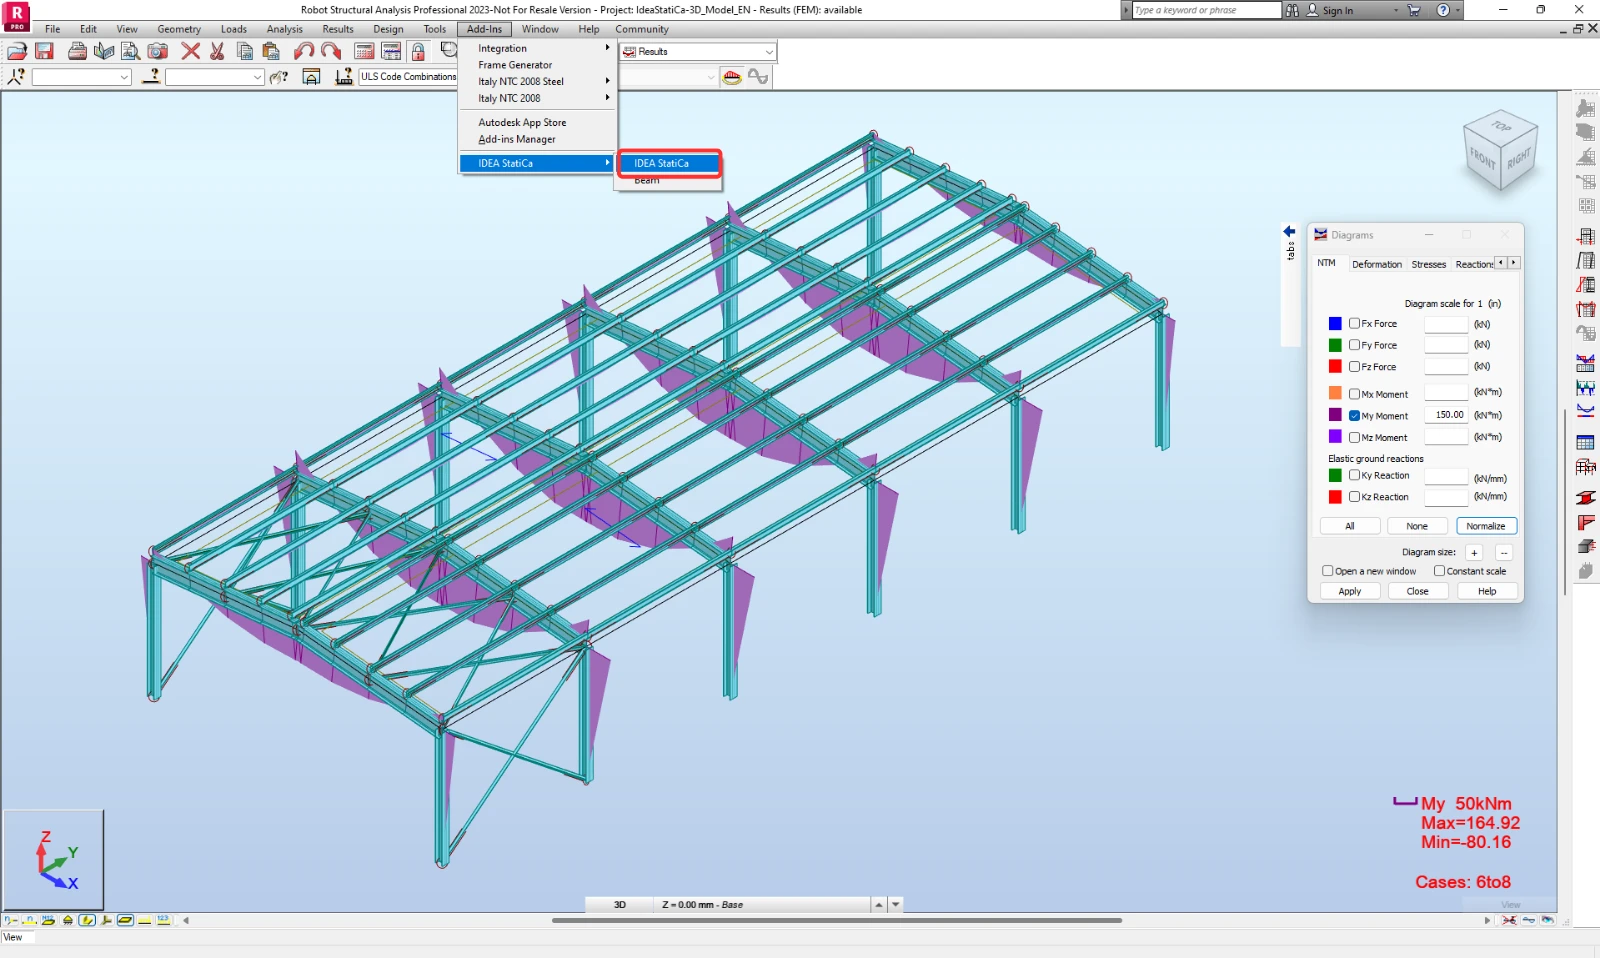
To run the Checkbot, use the Add-Ins button. And find the IDEA StatiCa icon.
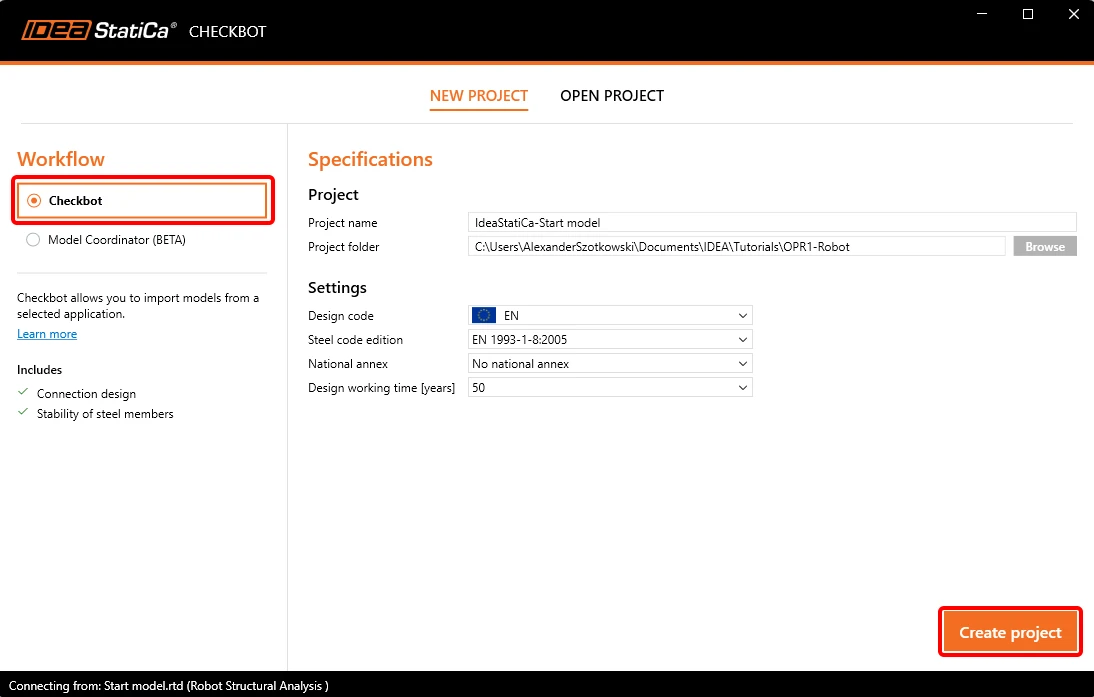
After launching the Checkbot app select the workflow Checkbot and design code EN. Then select Create Project.
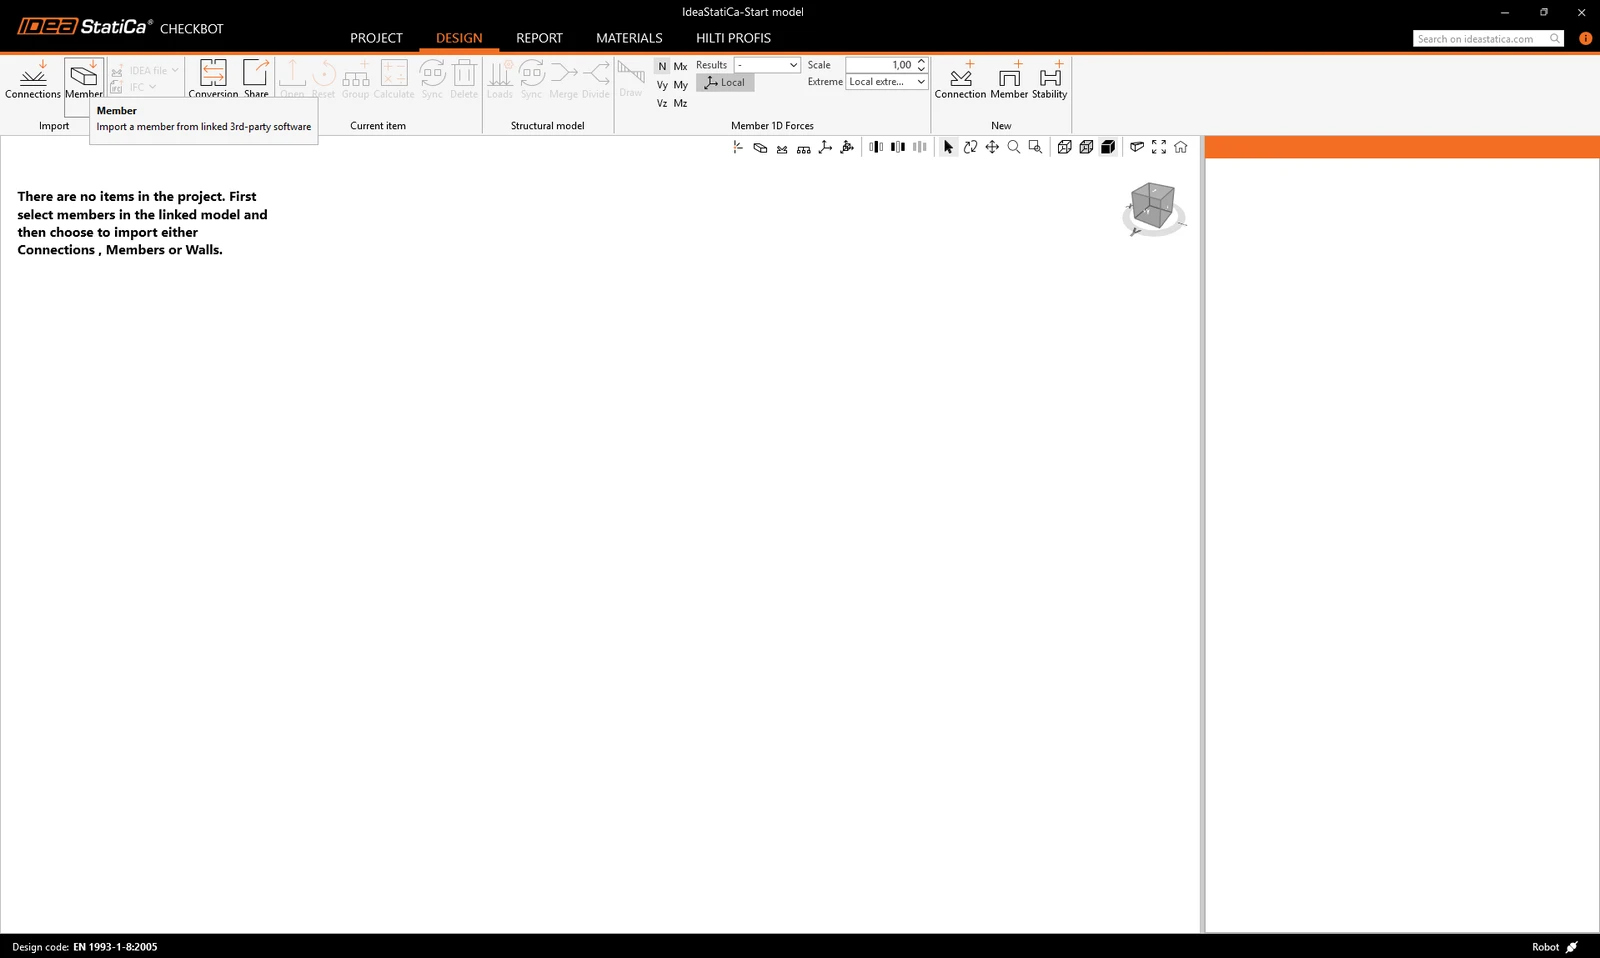
Import
The new Checkbot project is ready to import connections and members from Robot Structural Analysis.
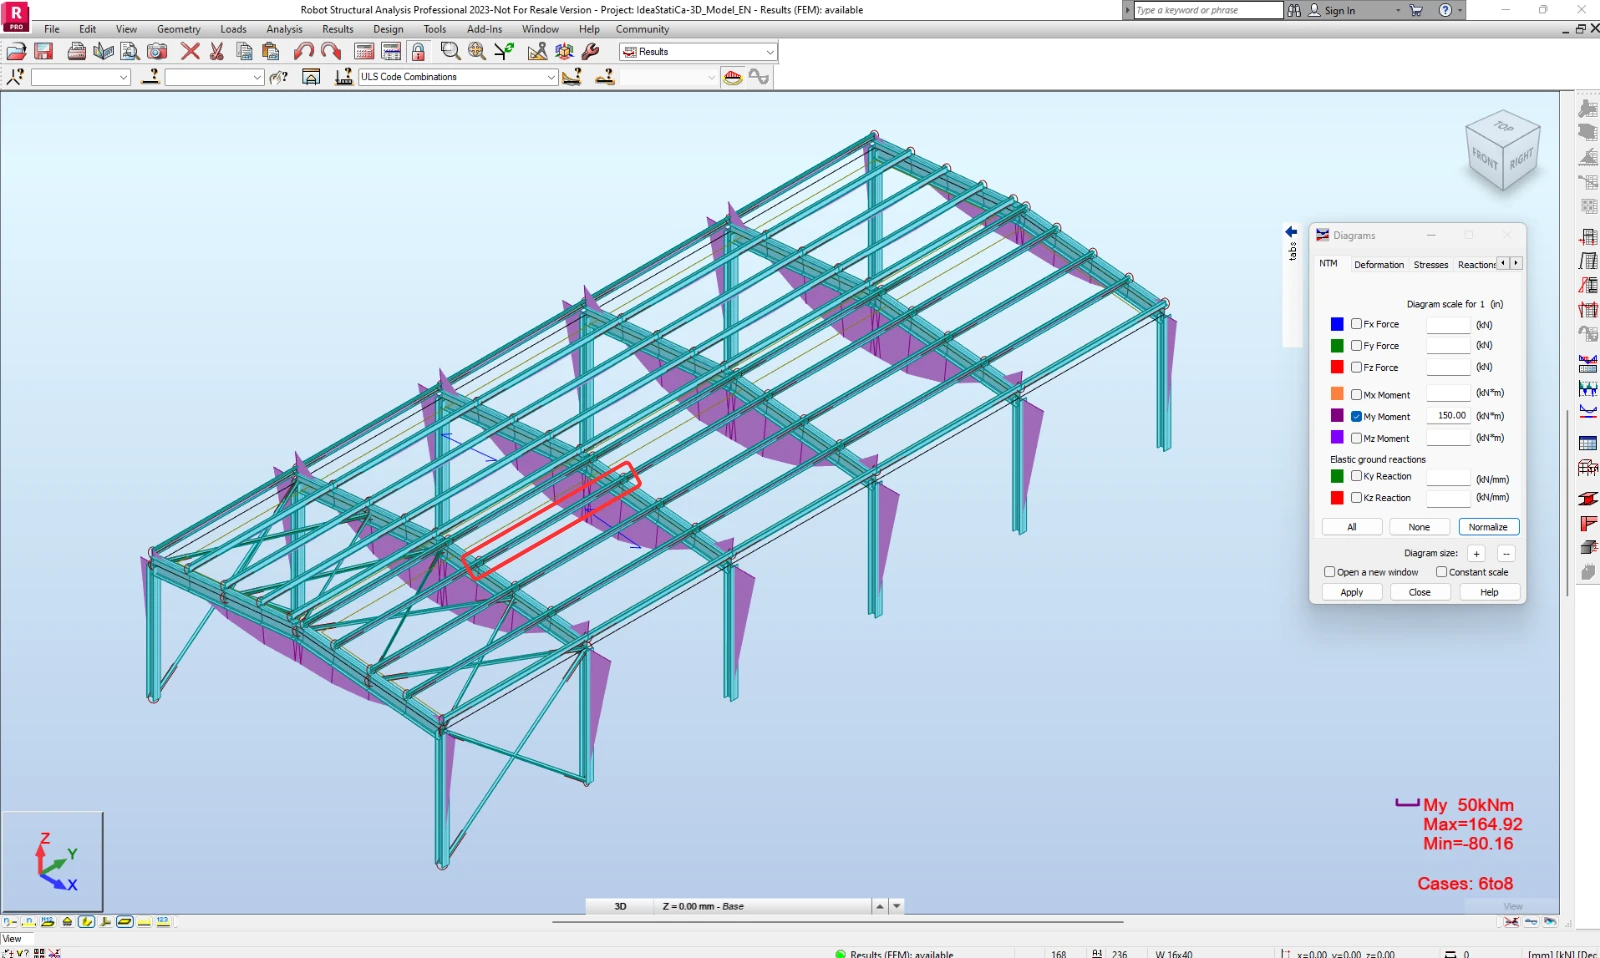
In Robot Structural Analysis, select one of the inside members, as shown in the following picture.
Geometry
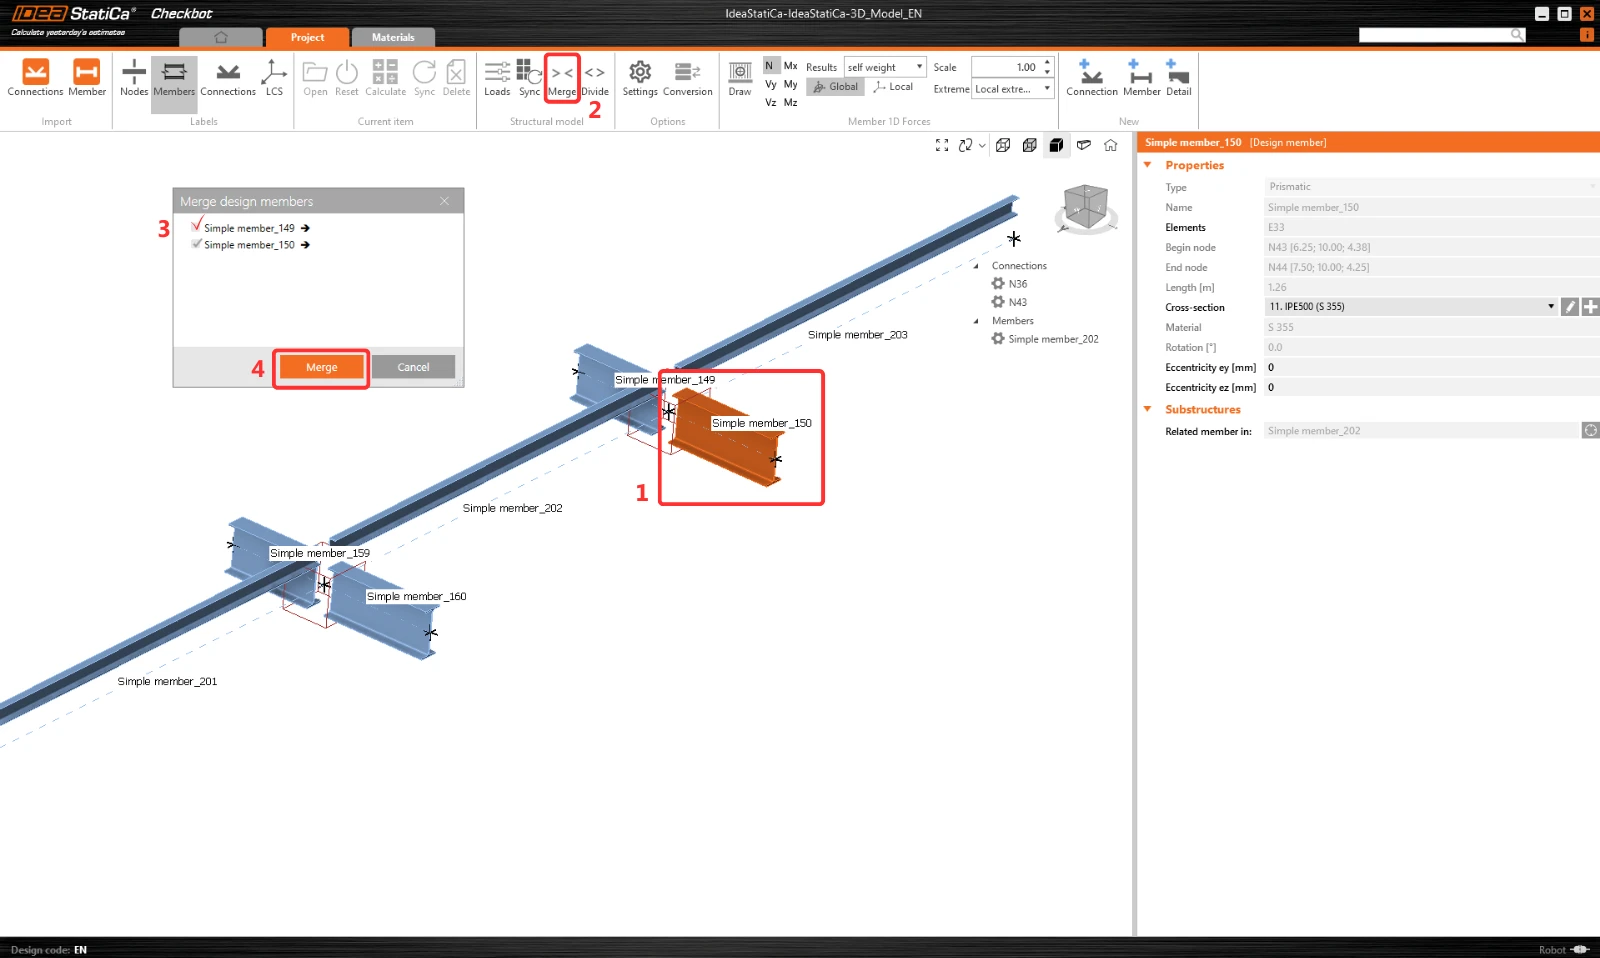
In Checkbot you can merge separated members into a continuous one. Merge both supporting beams. Select the related member 150, click the Merge command.
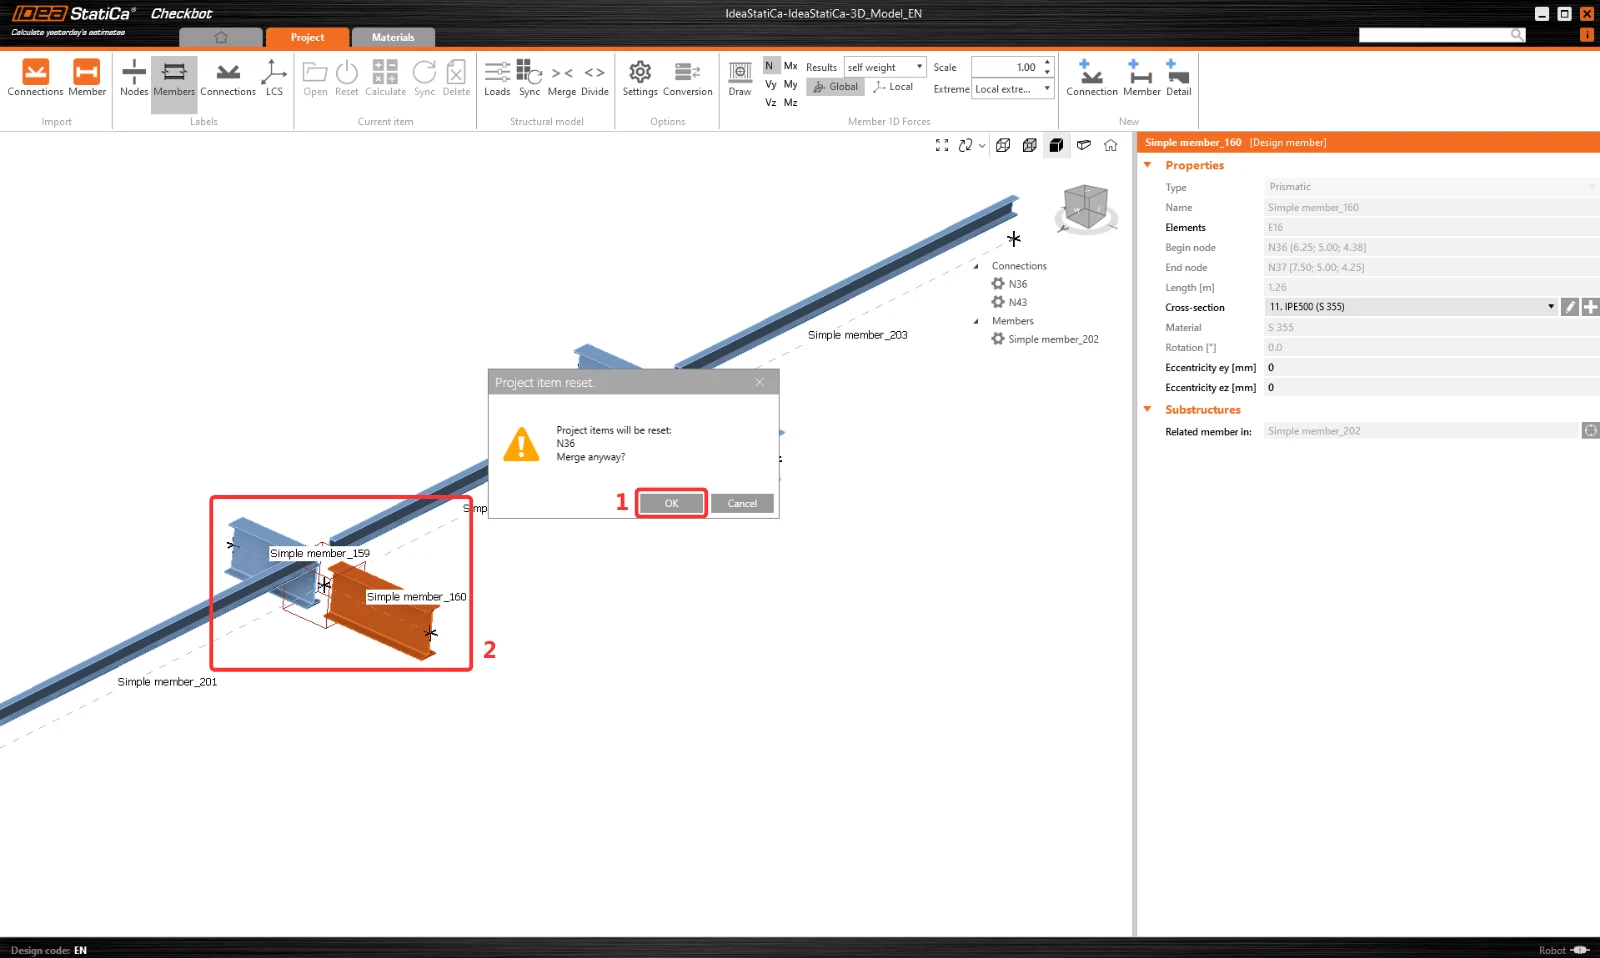
Same merging operation as previous for related member 160.
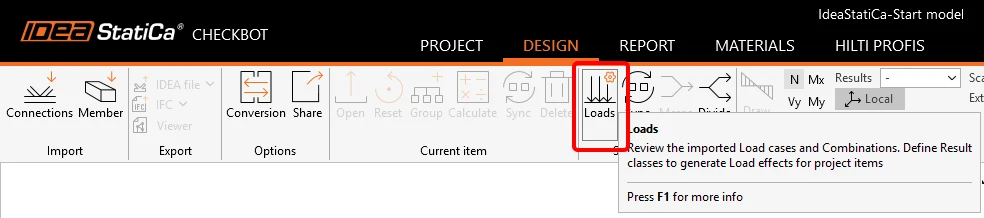
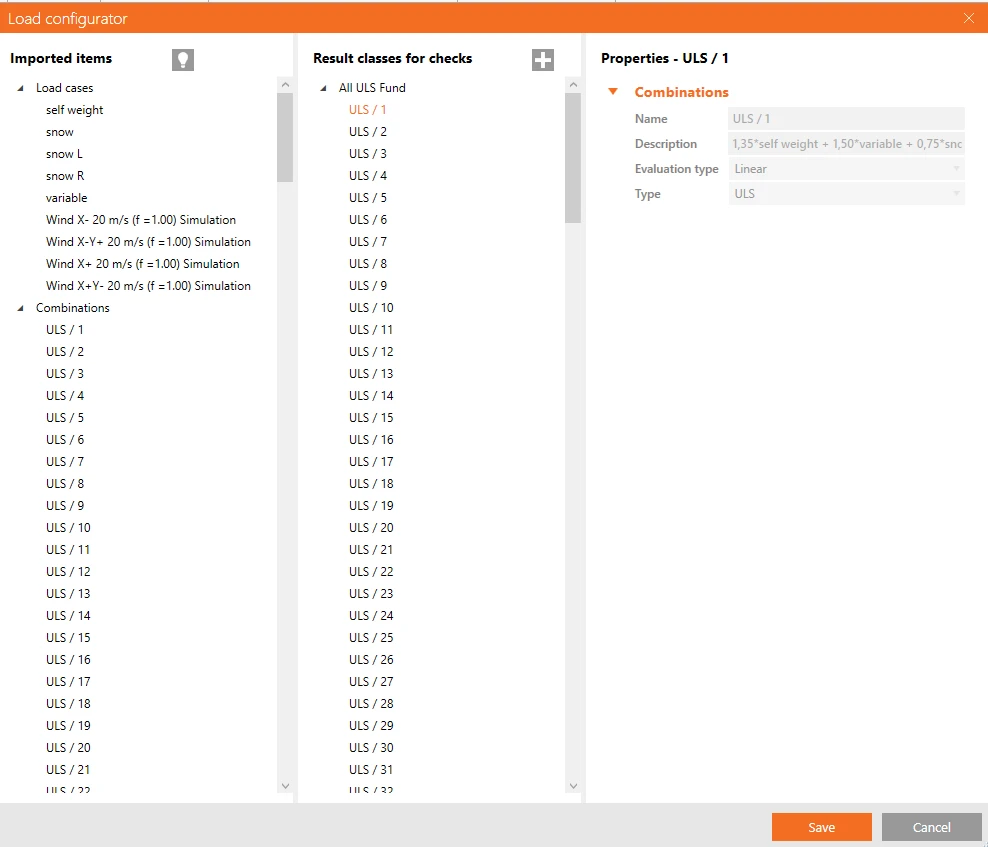
You can control which load cases and combinations are used for the analysis in the Checkbot application by clicking on Loads and managing the Result classes in the checks column.
Connections - Arrangement and Group creation
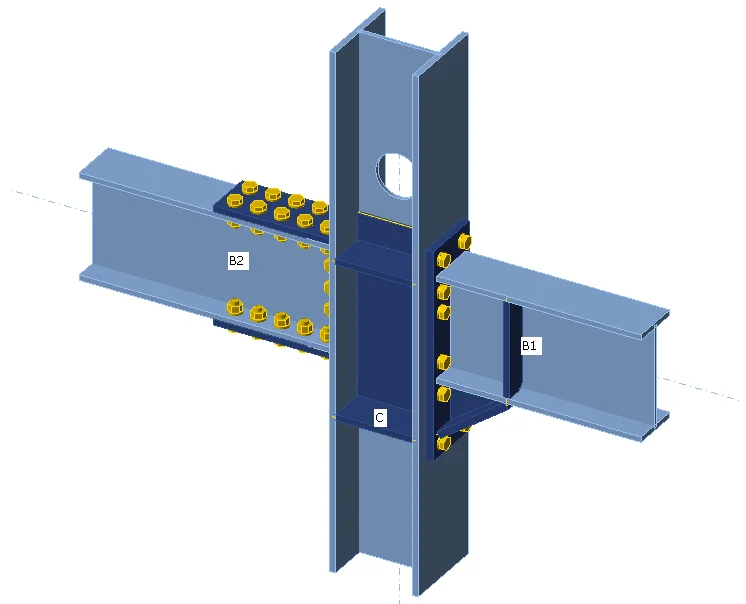
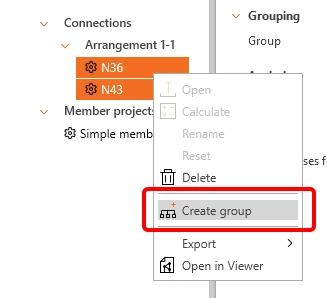
Since we have two similar joints, IDEA StatiCa has already grouped them into a single Arrangement. To design and get both joints checked in one stem, we have to group them. Select both, right-click, and click on Create group.
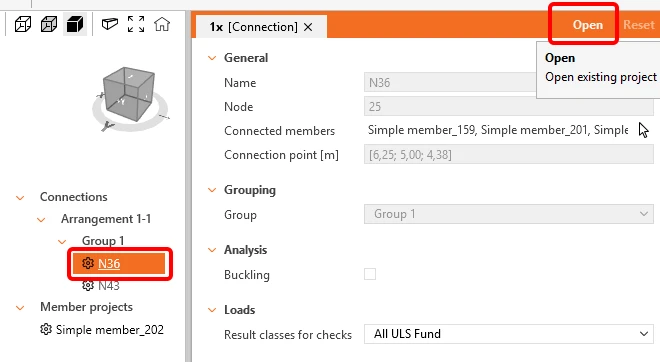
Select the reference connection (underlined in the tree) that drives the group's design, then open it.
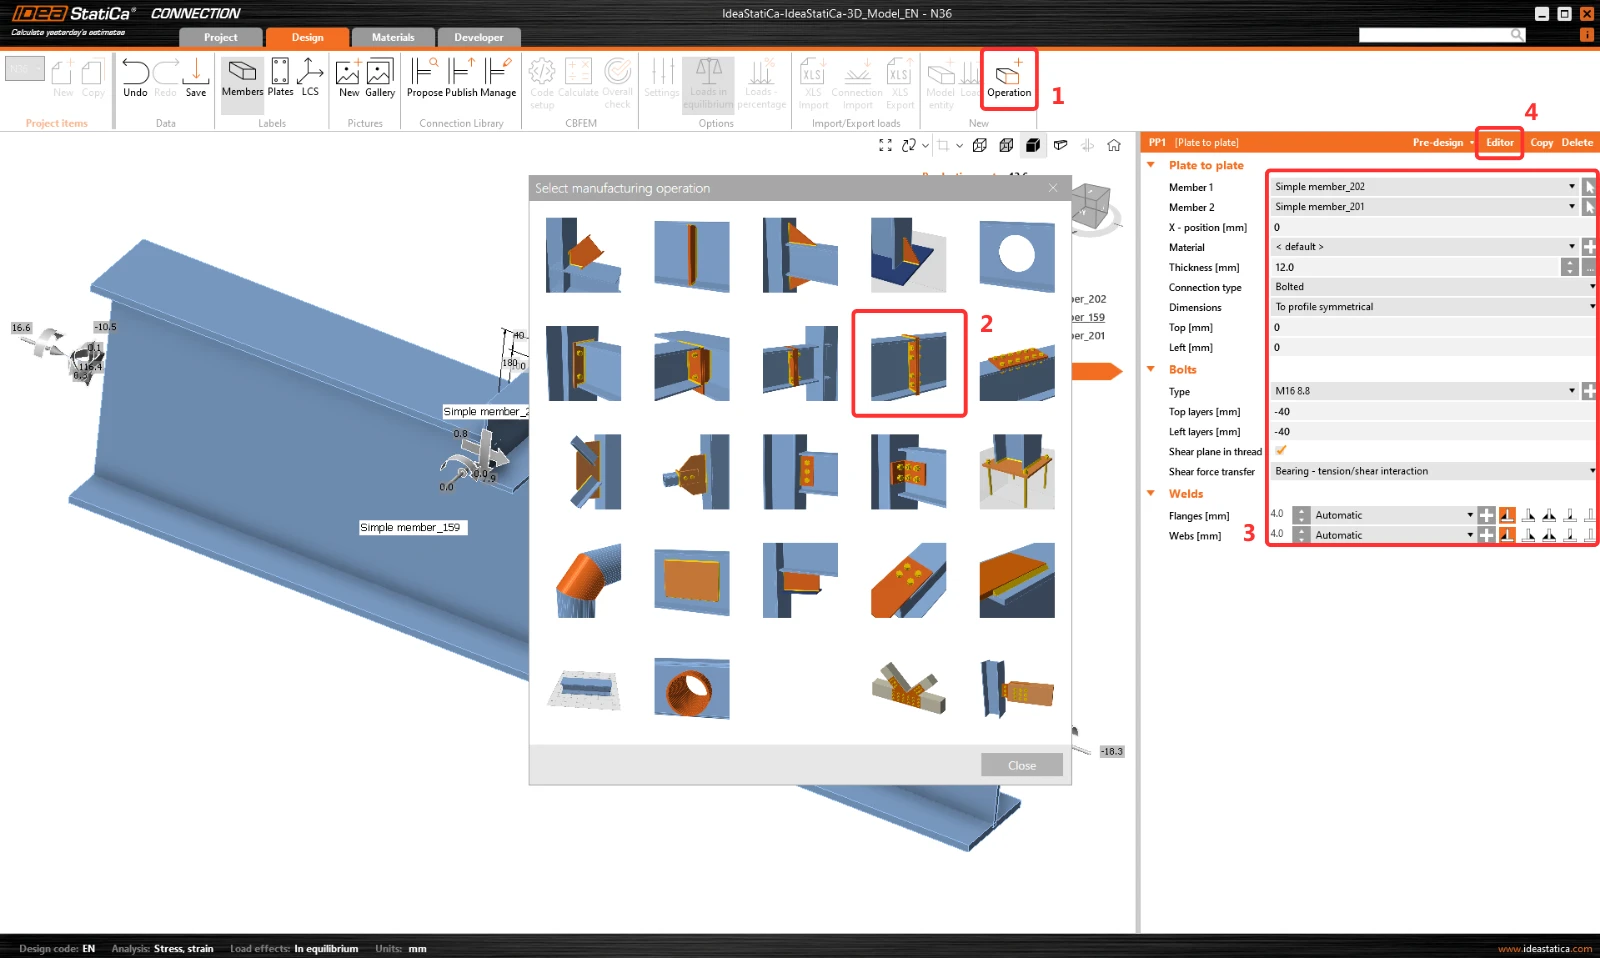
Click on Operation and select Plate to plate. Set the values according to the picture. Then click on Editor.
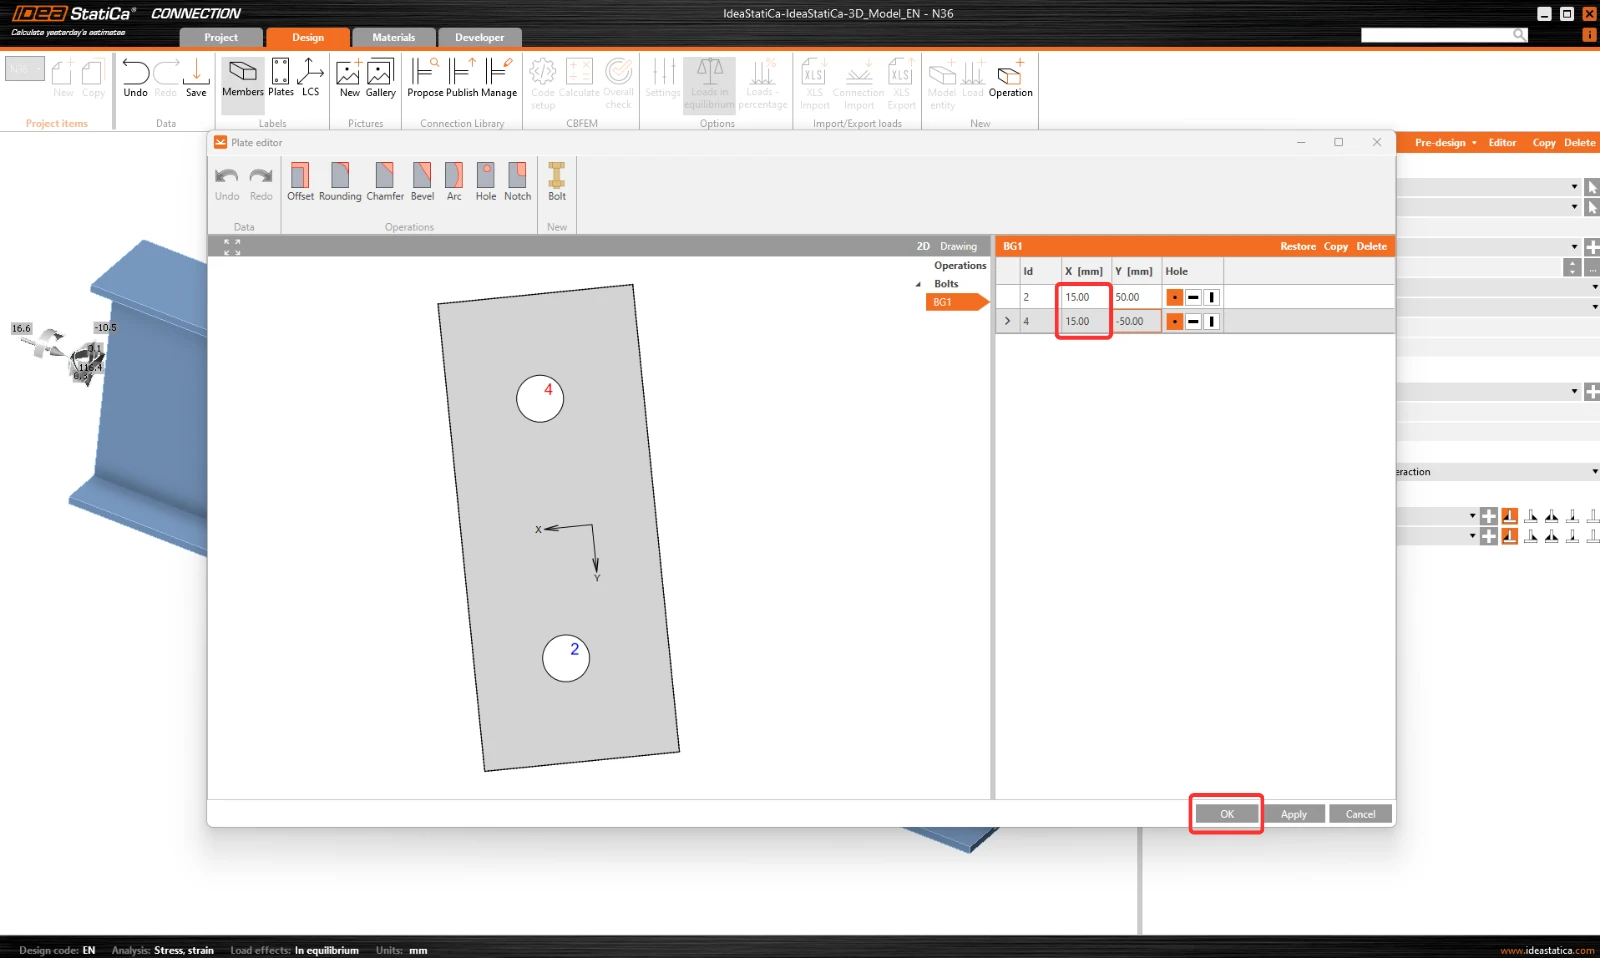
Click on Explode and delete bolts 1 and 3.
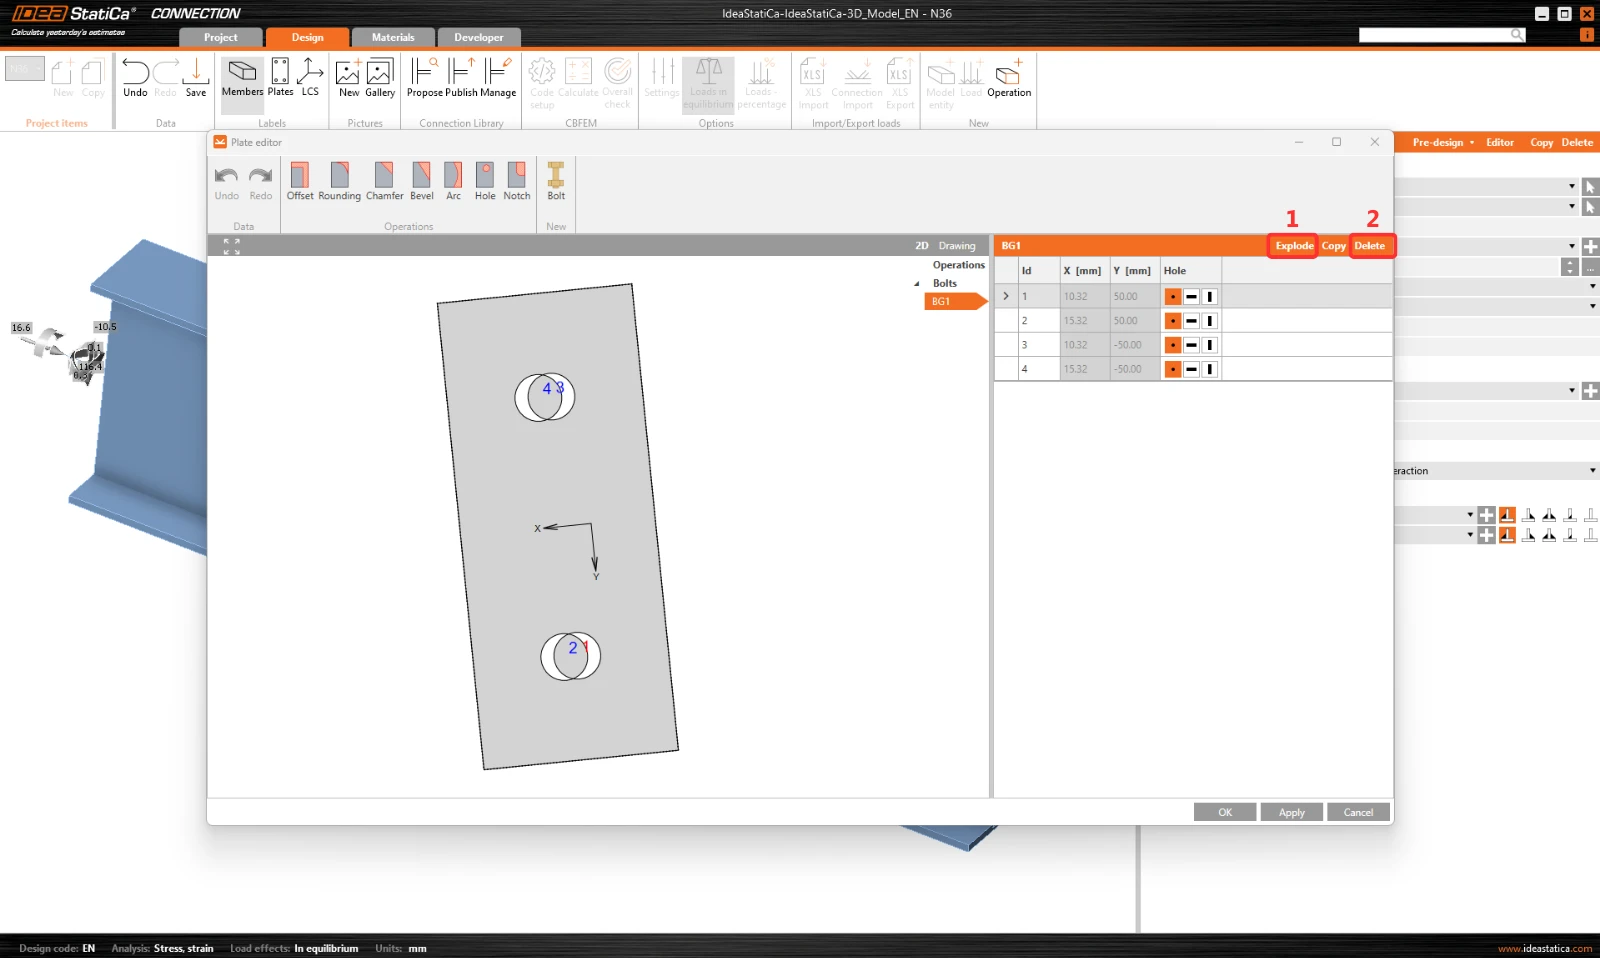
And set coordinates for bolts 2 and 4 according to the picture. Confirm changes by clicking OK.
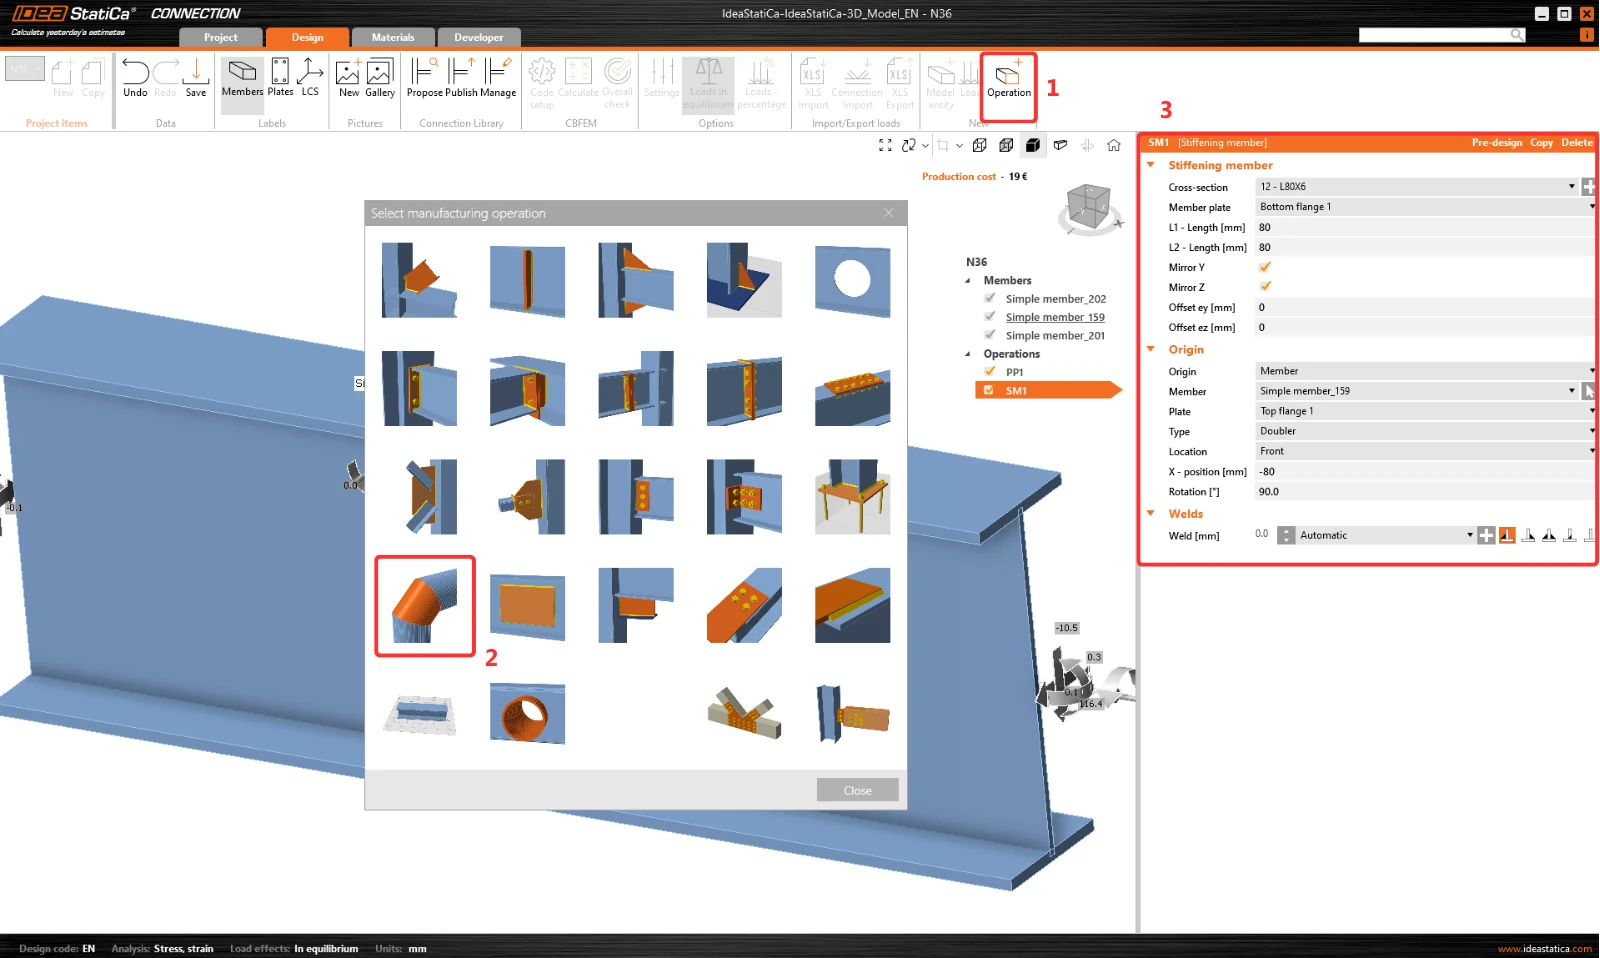
The next operation is the Stiffening member, set L-profile L80x6 with the following values.
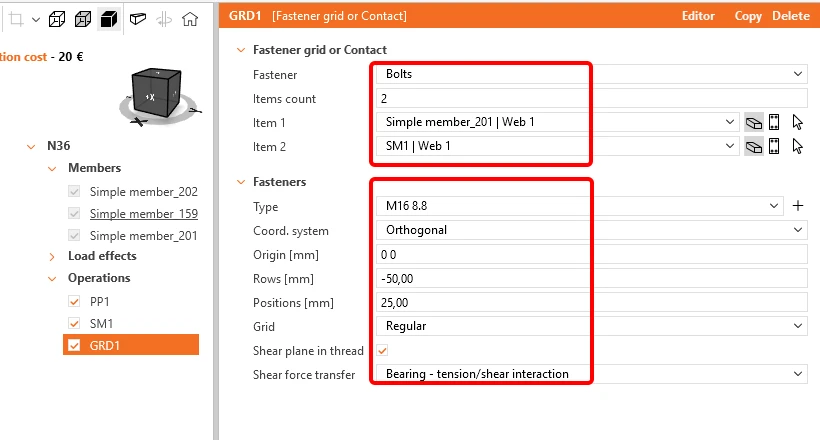
Add the operation Bolt/Anchor grid and modify the parameters.
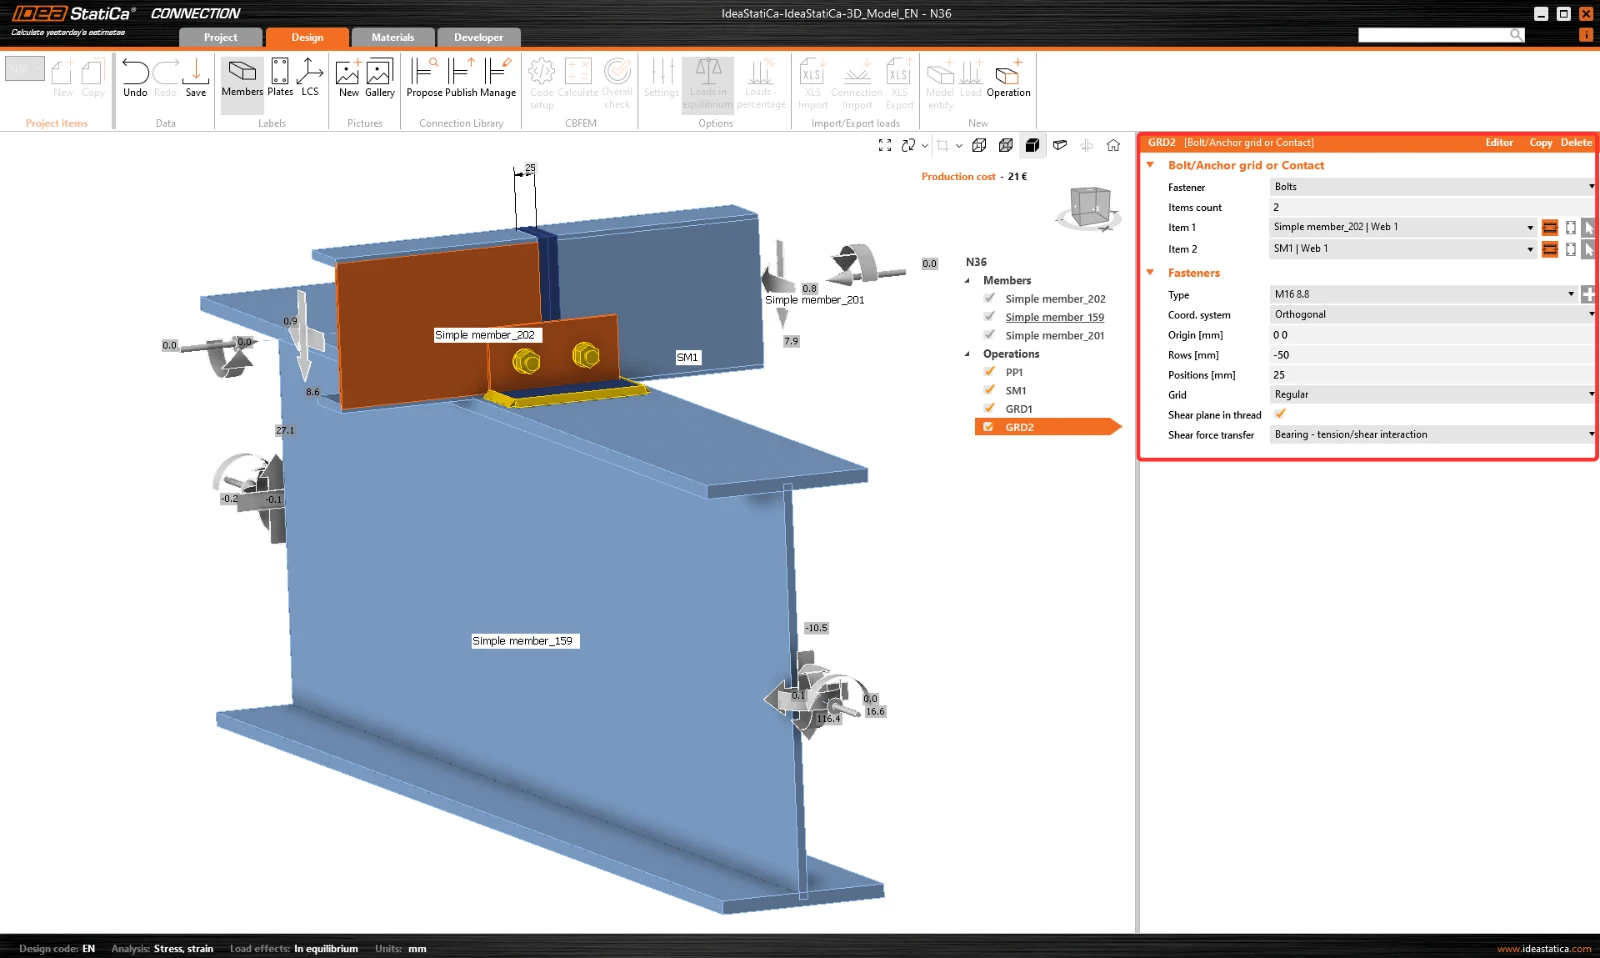
Copy this operation and change the selected values.
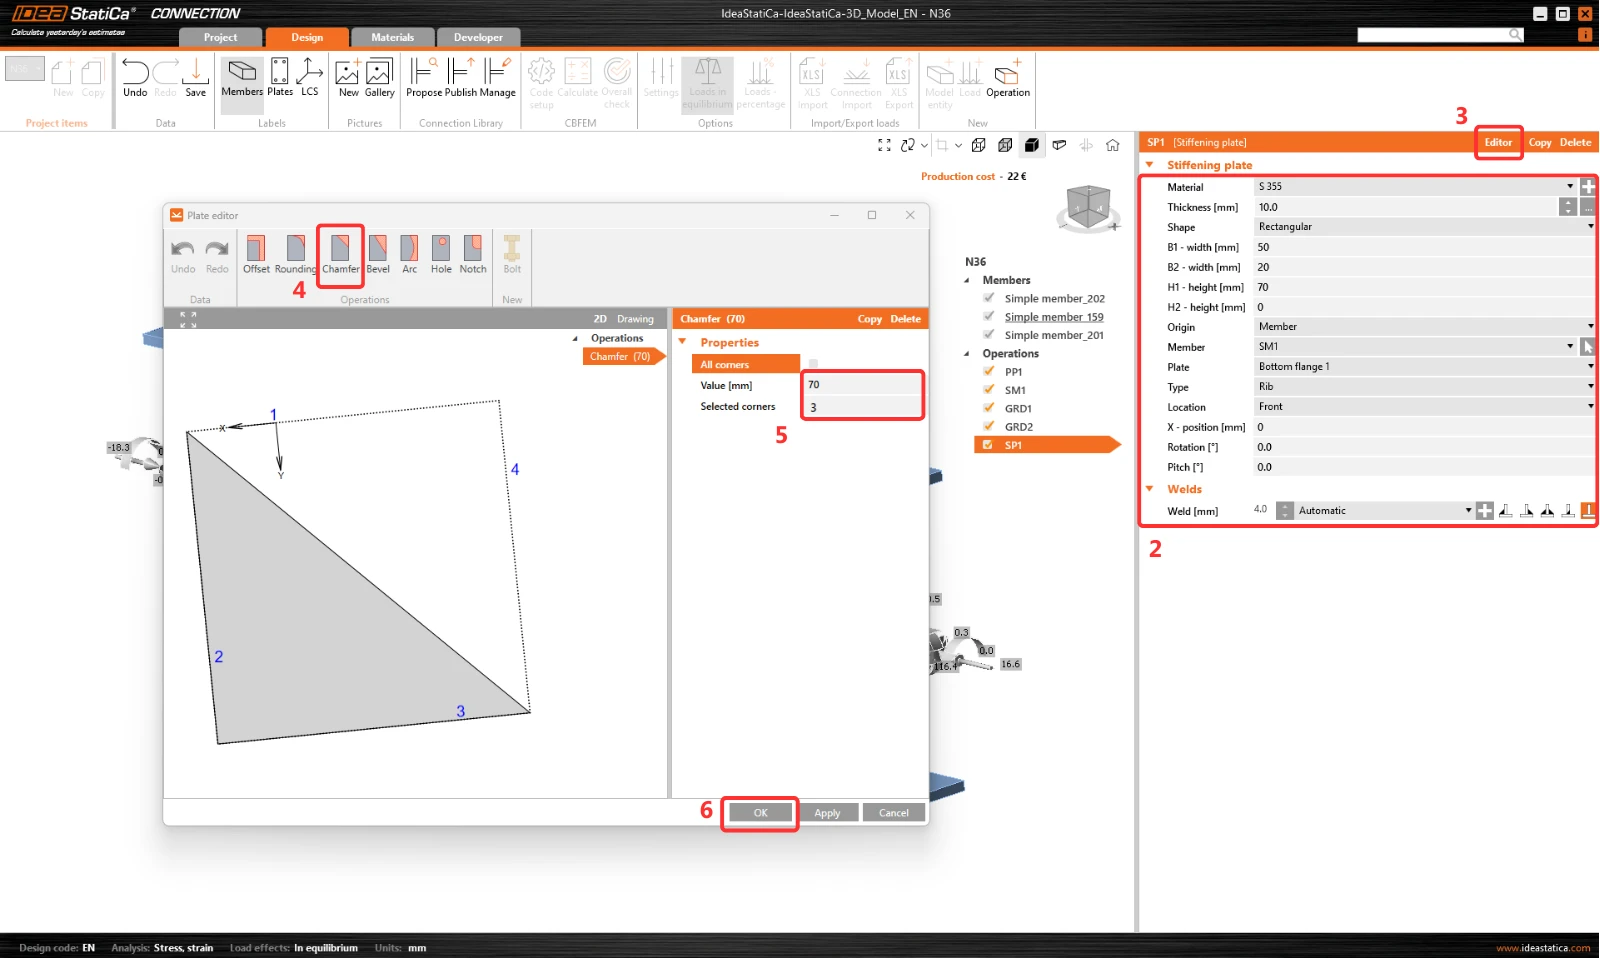
Now add a Stiffening plate to the joint.
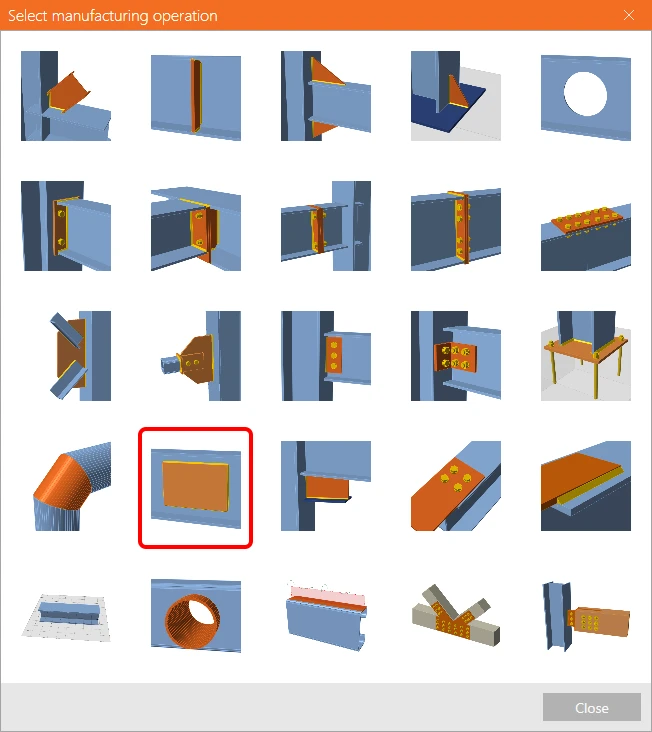
And modify its shape in the plate Editor. Here, add the Chamfer operation to cut the plate.
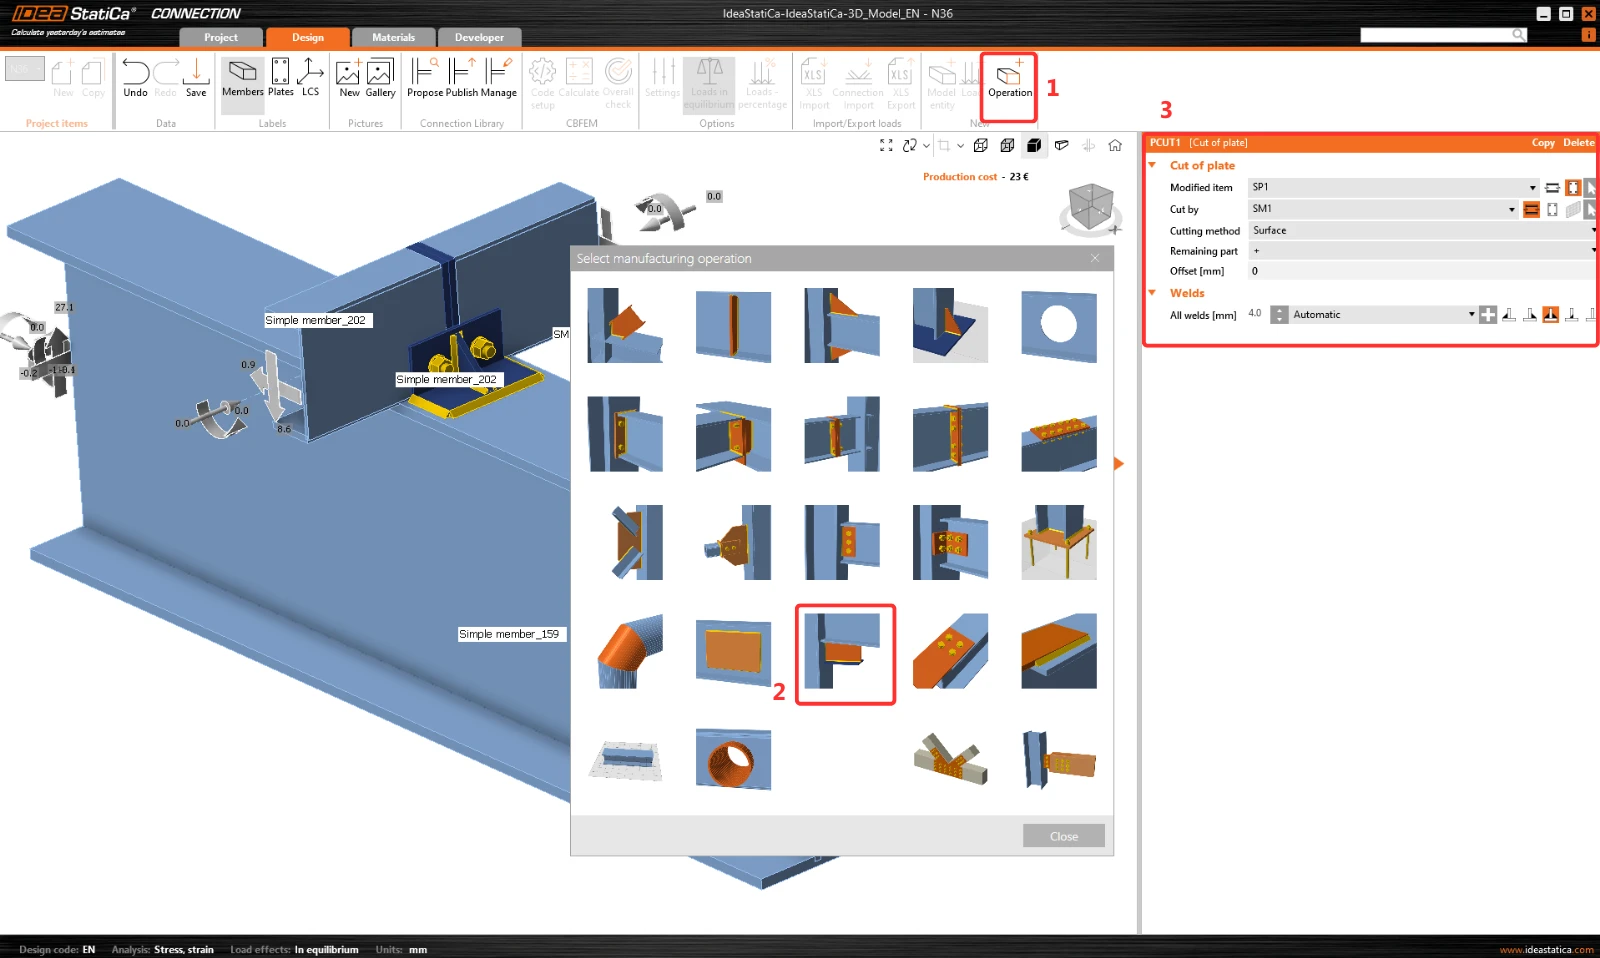
The last operation is the Cut of plate.
Now click on Save and close the module Connection.
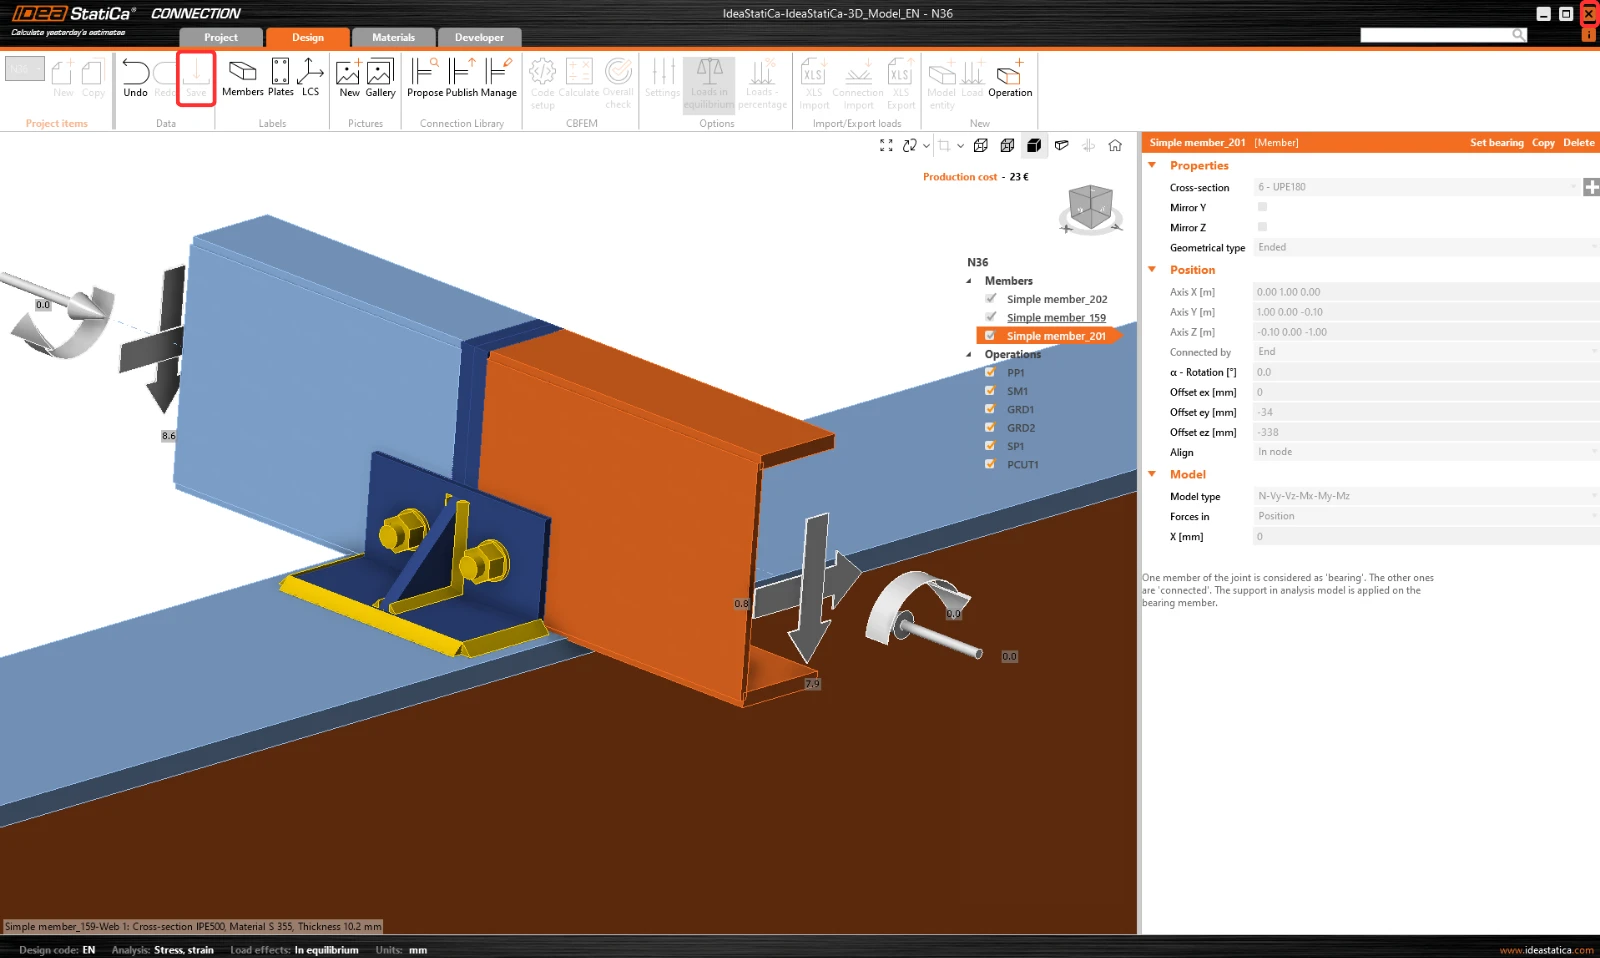
Now you can run the check of the joint. A green marks indicate correct results.
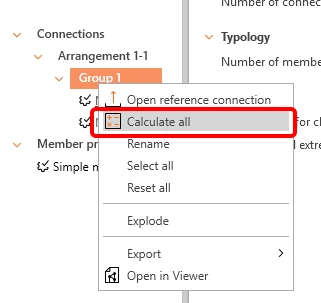
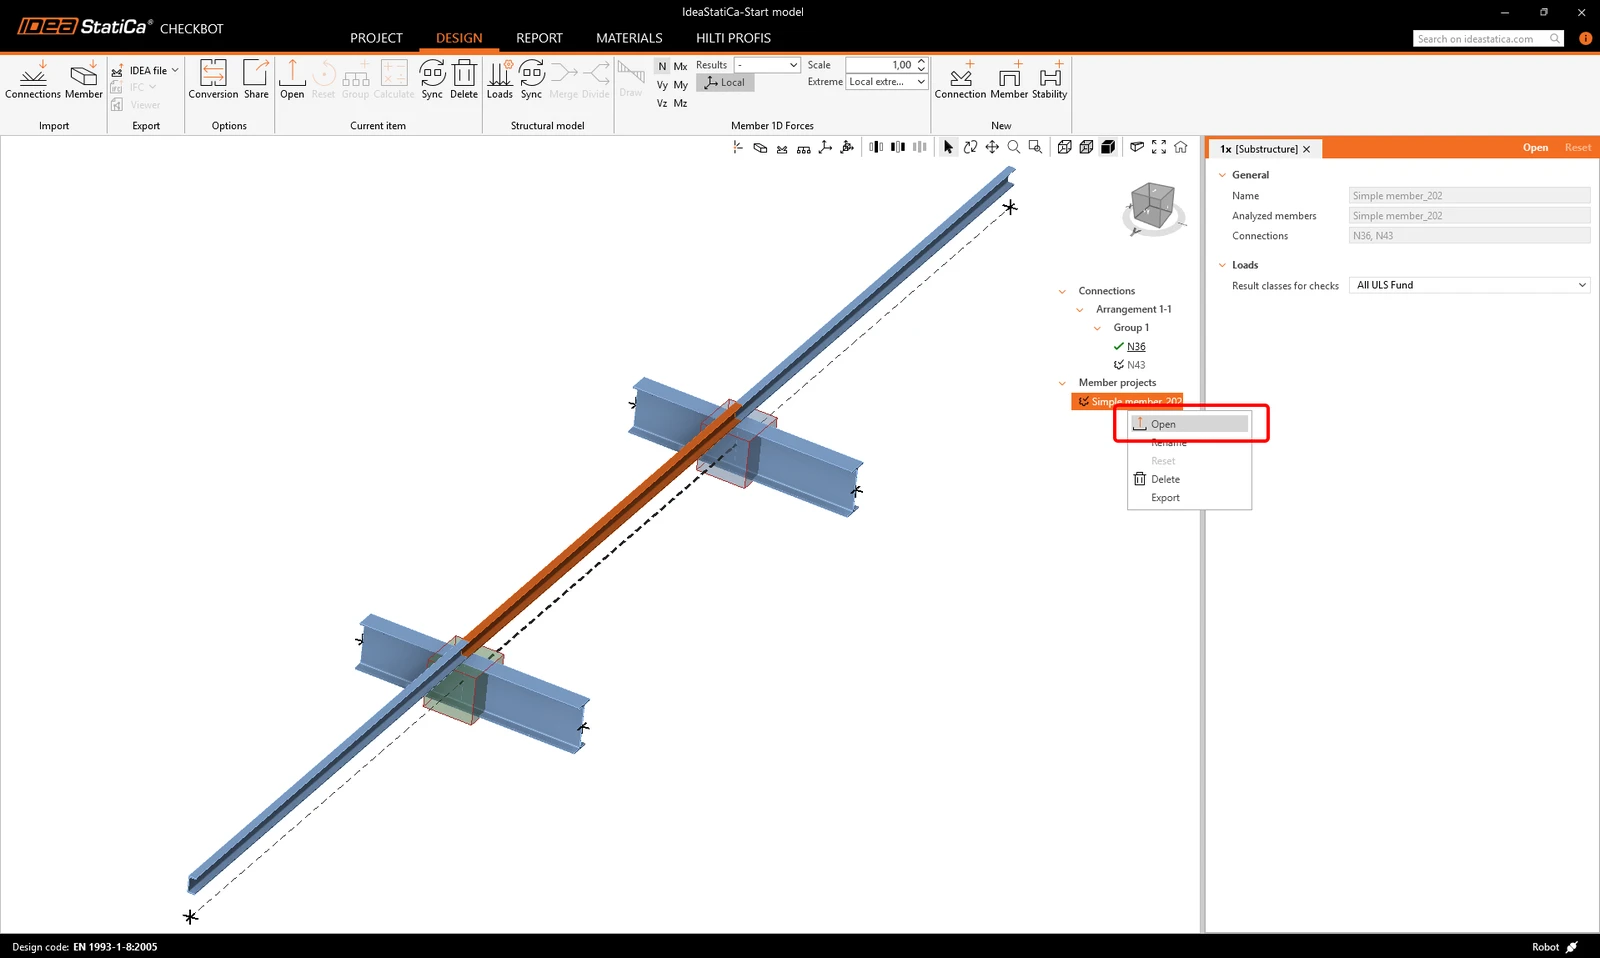
We can now open the Member module.
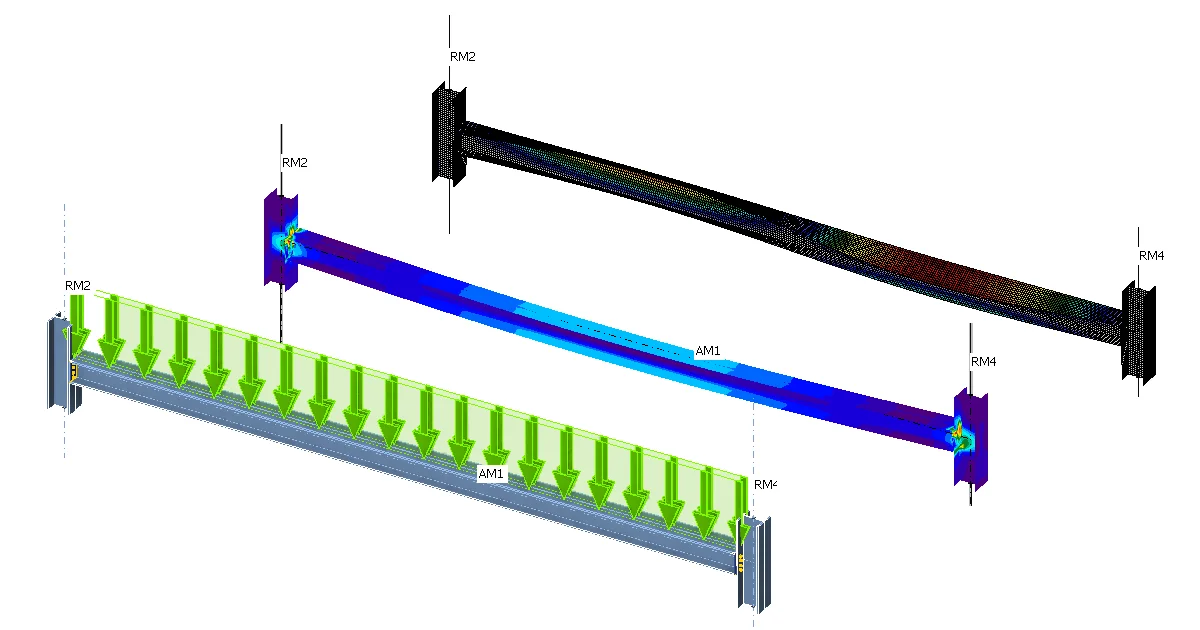
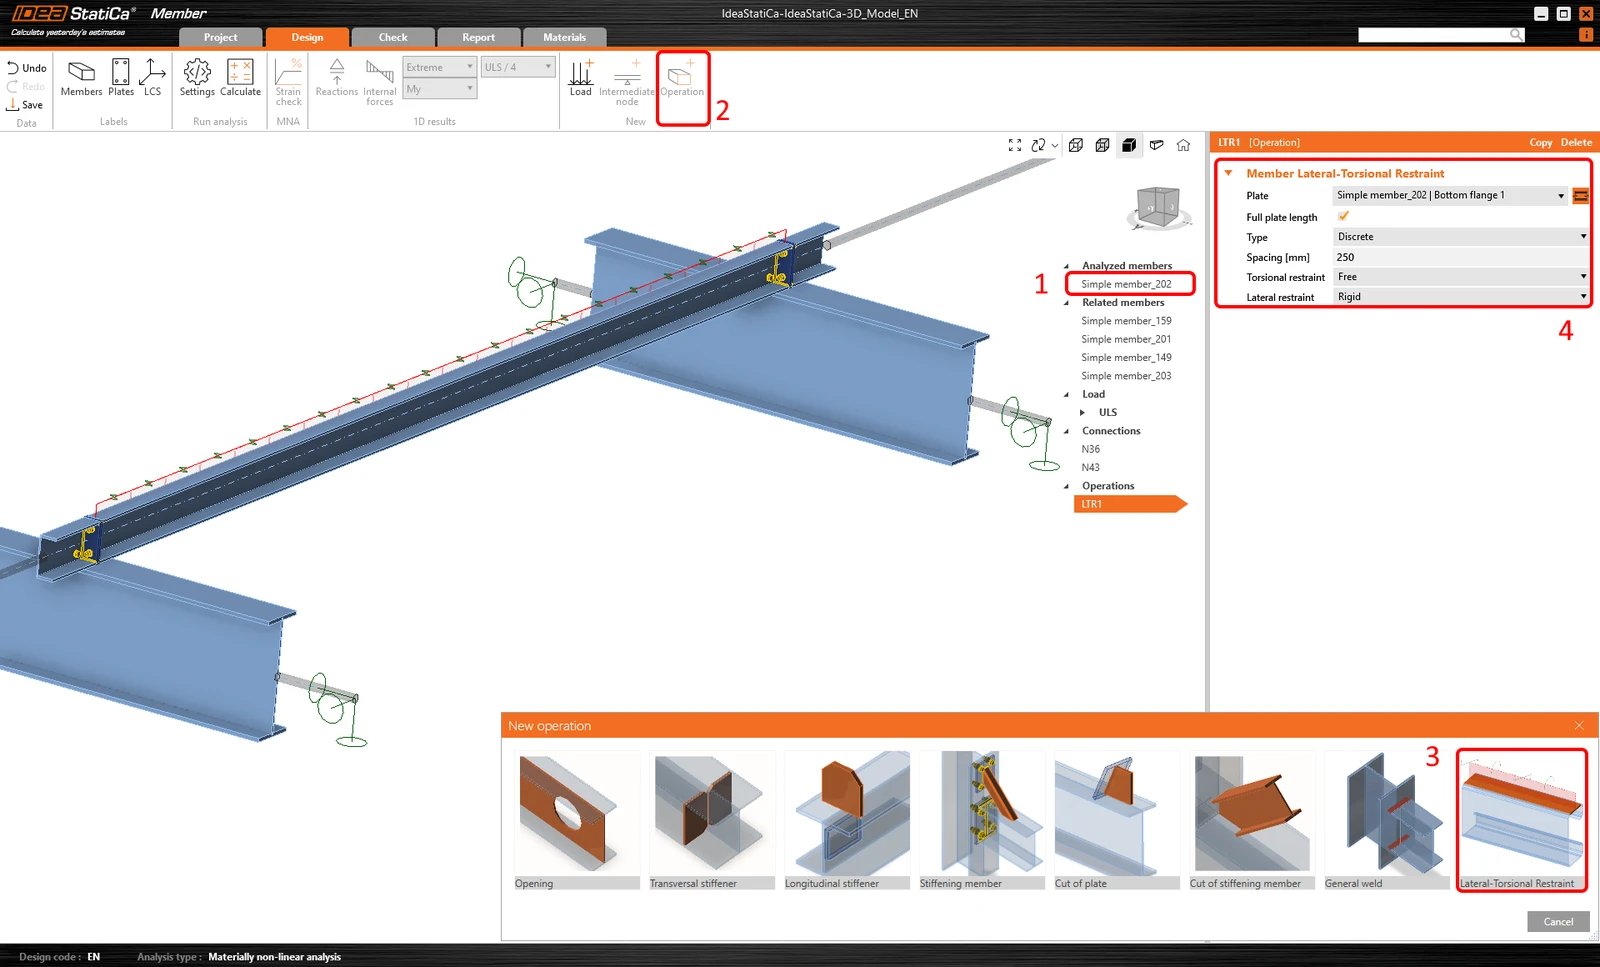
Because there are roof panels stabilizing the analyzed purlin, add the operation Lateral-Torsional Restraint to simulate it and set the parameters.
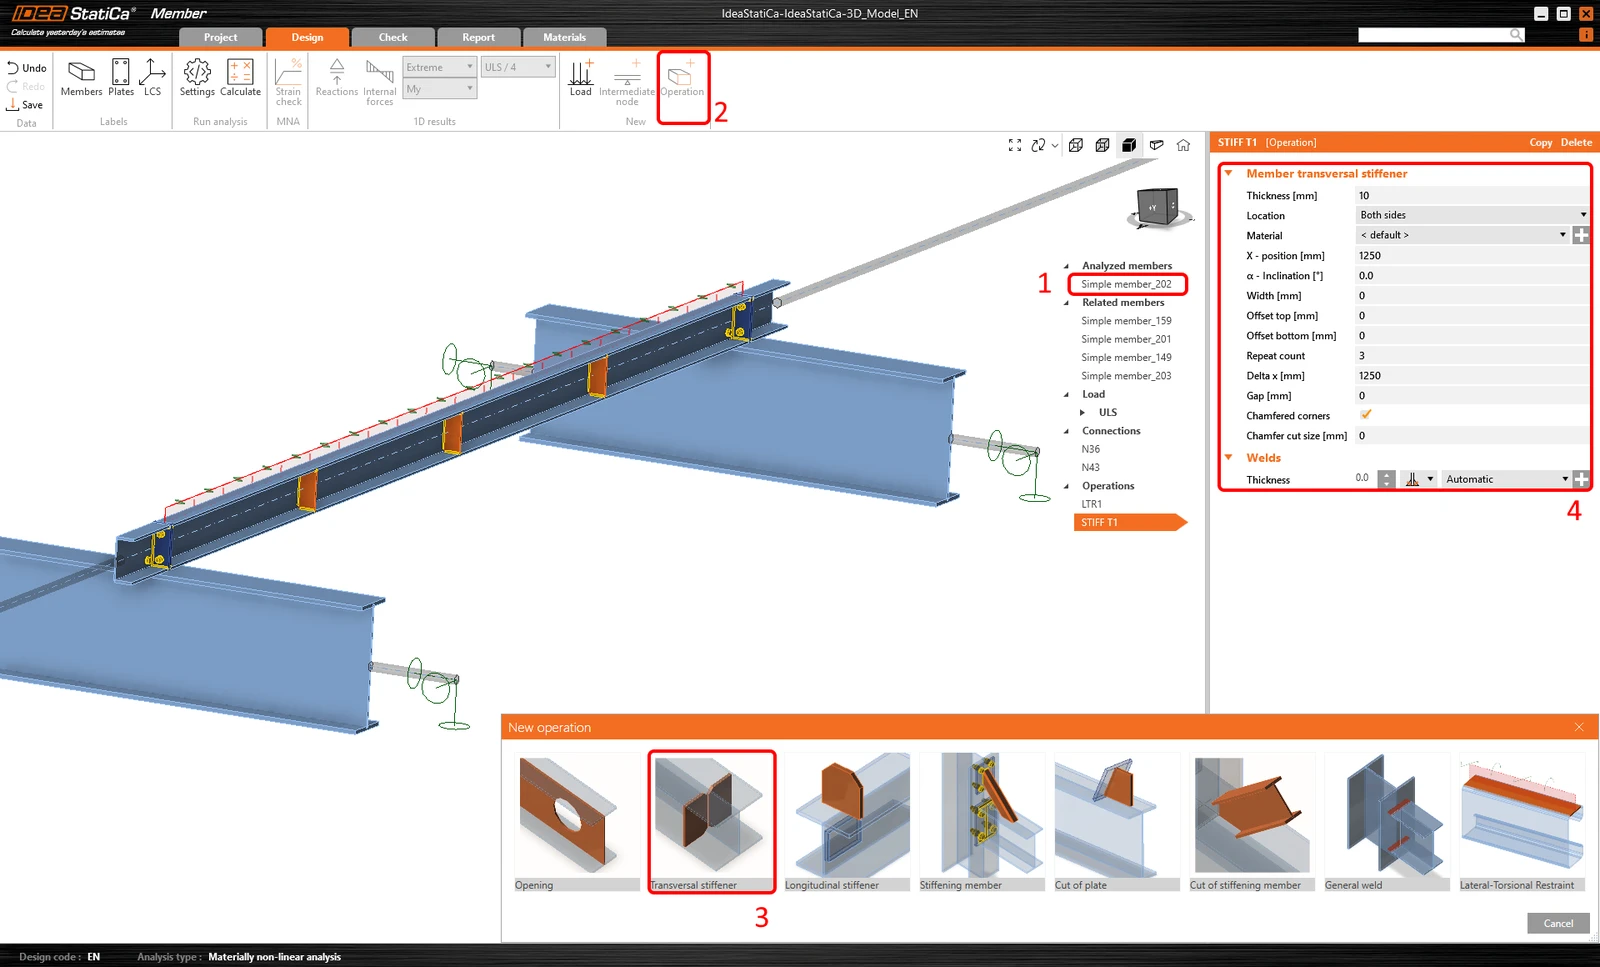
Then add the operation Transversal stiffener.
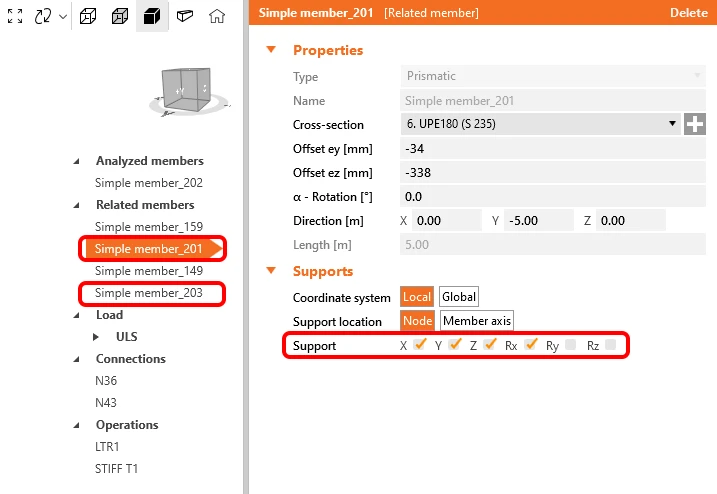
For the proper structural behavior of related members, set the supports of the connecting purlins 201 and 203 to X, Y, Z, and Rx.
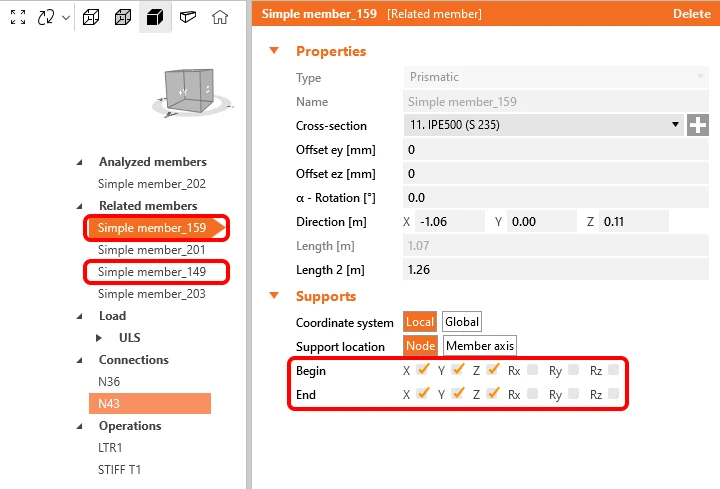
As well as for the supporting members 149 and 159 set supports to X, Y, Z.
Code-check
Now, the member model is ready for the analysis.
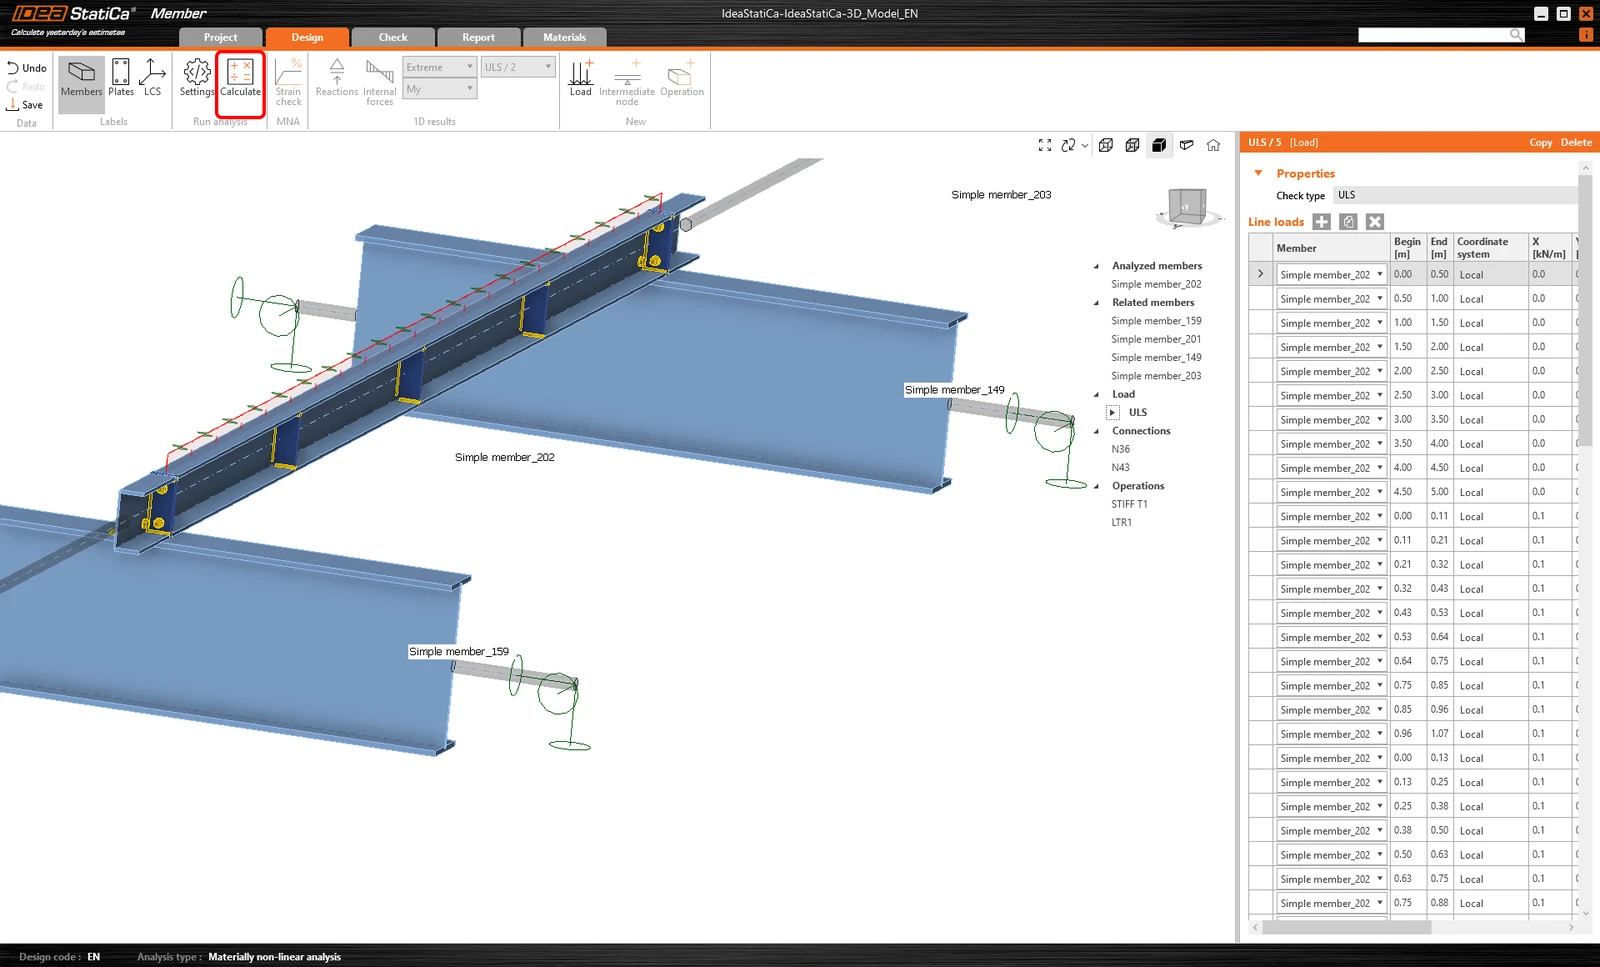
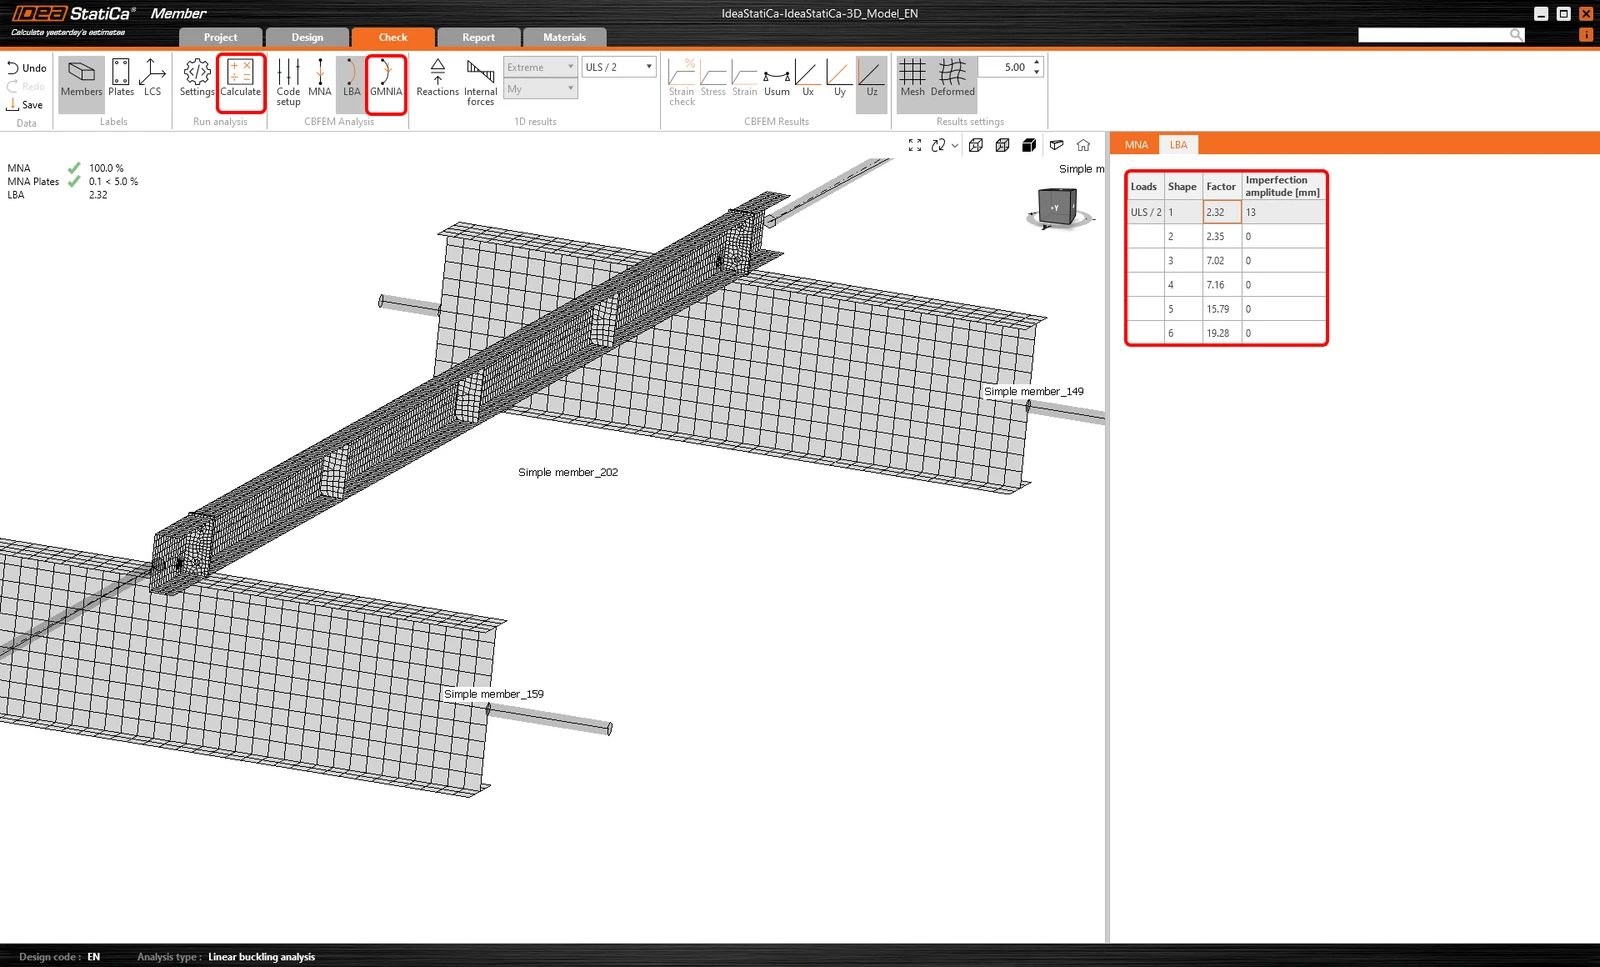
Run the MNA (materially non-linear) analysis with the Calculate button.
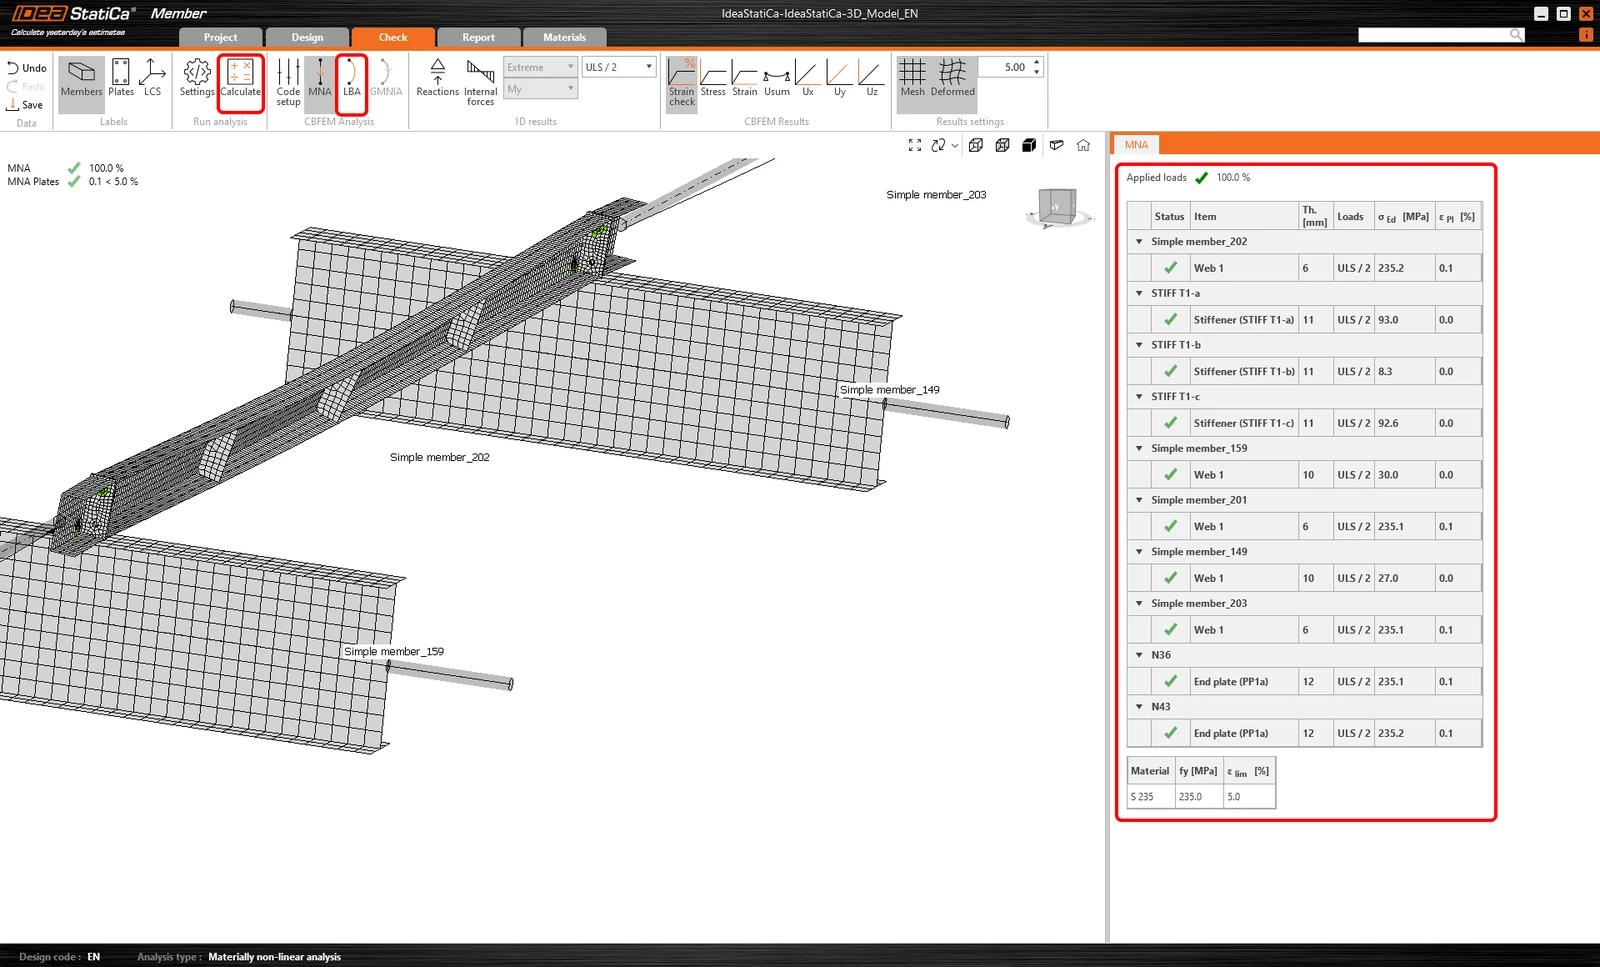
The second analysis is LBA (lateral buckling analysis), where we get a critical factor of less than 15. This result shows the necessity of running the GMNIA (geometrically and materially non-linear analysis).
Before running the GMNIA (geometrically and materially non-linear) analysis, fill in the Imperfection amplitude value. Because lateral-torsional buckling is investigated here, factor k0 = 0.5 may be used. Amplitude 0.5x5000/200 = 12,5 mm can be applied to the first buckling mode.
Read more about:
- Member stability in IDEA StatiCa Member.
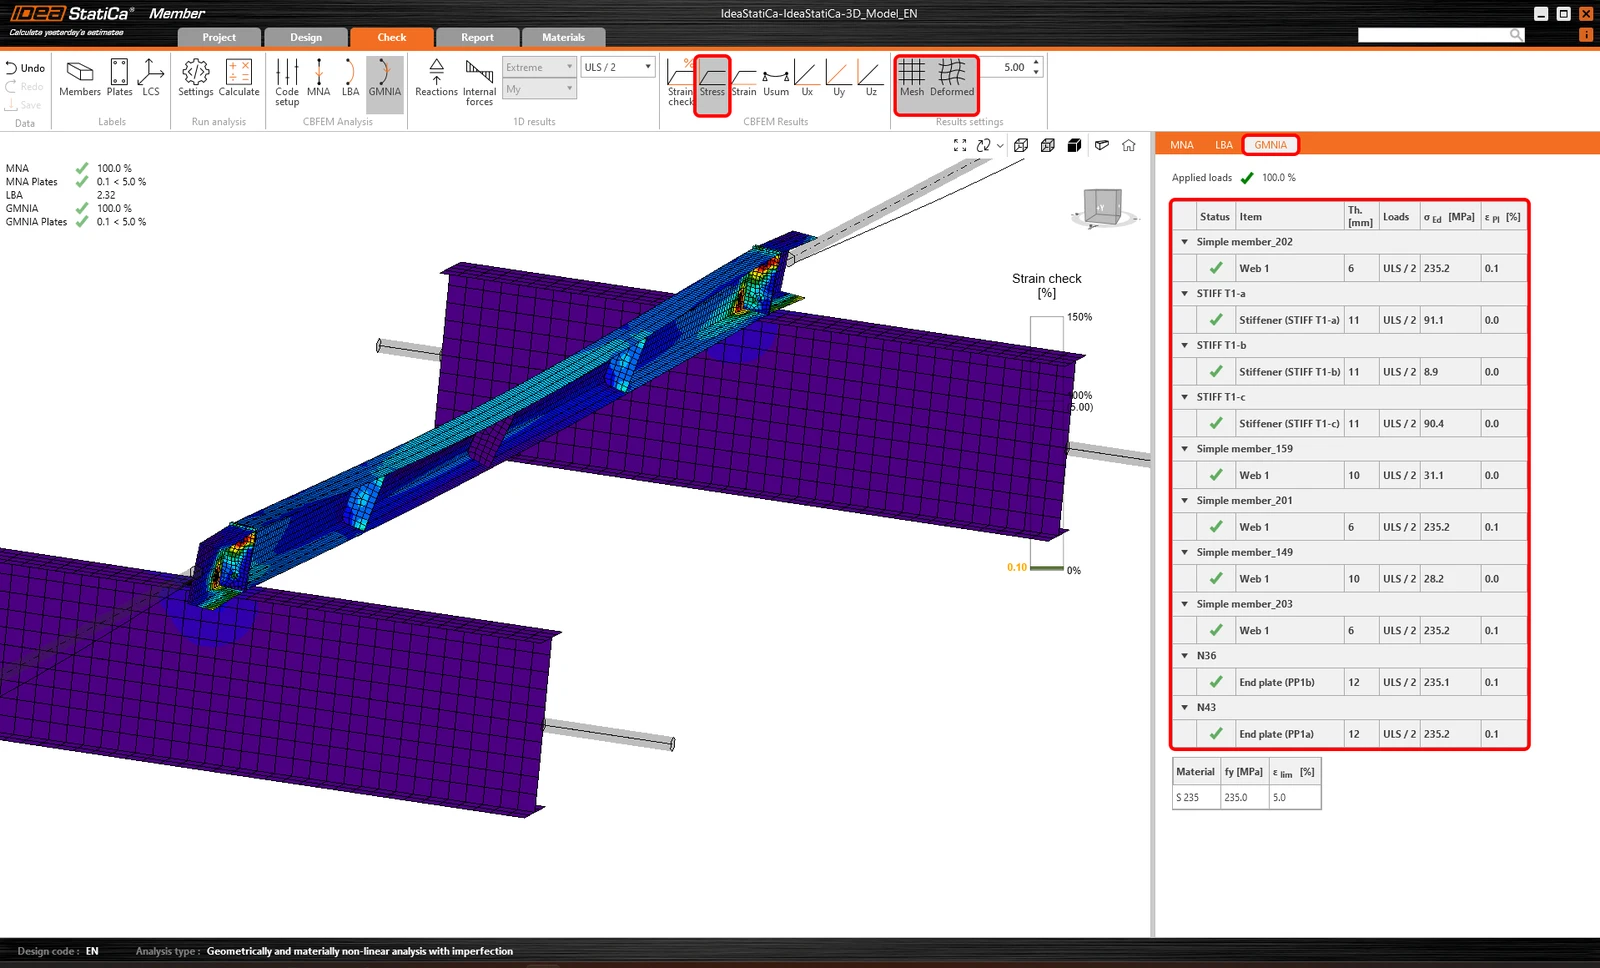
Once the analysis is finished, you can read the final code-checks, including the imperfections.
Report
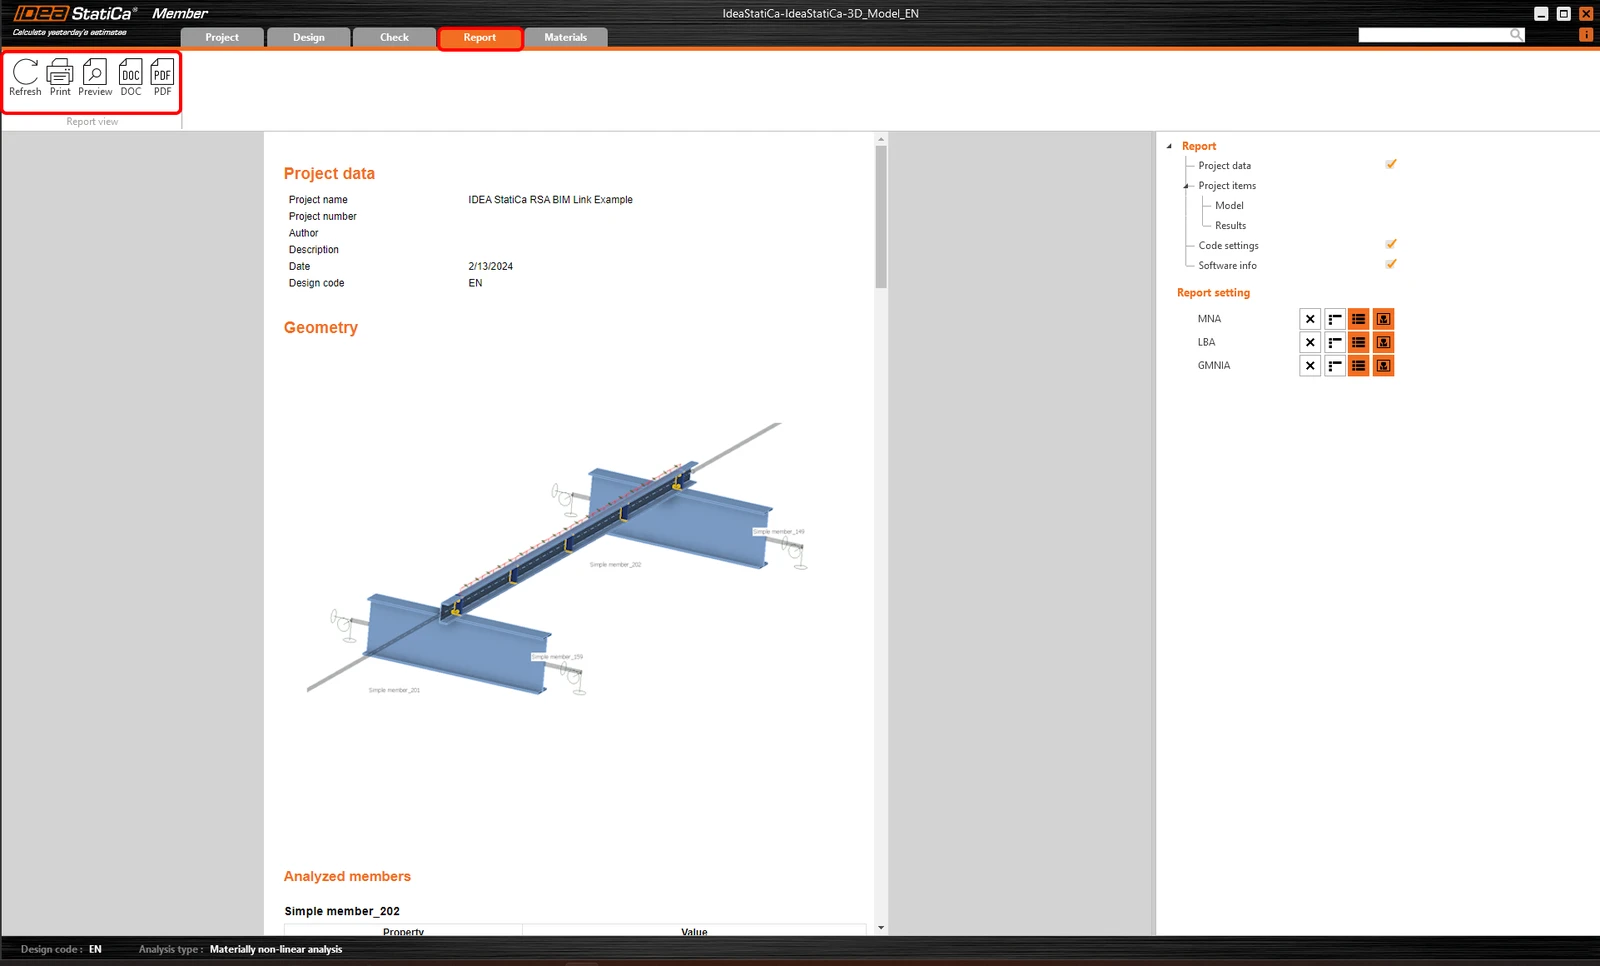
At last, go to the tab Report. IDEA StatiCa offers a fully customizable report to be printed out or saved in .doc editable format.
Synchronize members
Sometimes, there are changes to your FEA/BIM model, such as different member section size or loads. These can be synchronized between Checkbot and the FEA/BIM model.
There are two possible alternatives:
- Synchronize the Current item (if one or more joints are selected)
- Synchronize the whole imported Structural model

To test this feature, you can change a member section size or shape in your FEA/BIM application or amend a load case or combination etc: change columns to a bigger section. Remember to re-analyze the FEA model.
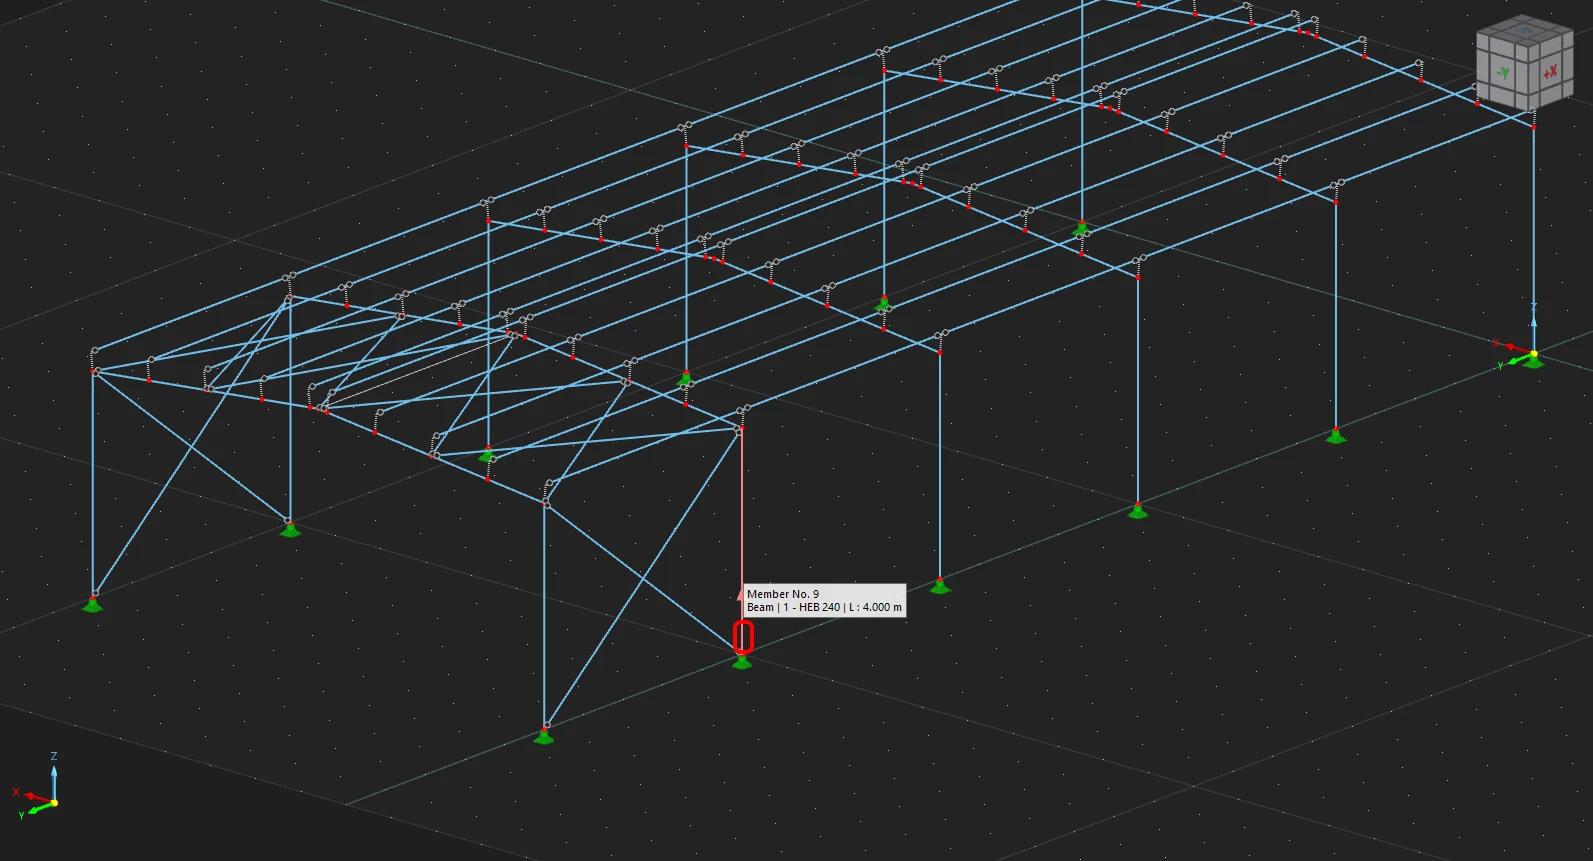
In Checkbot select the changed members (there may be more than one) and from the Current item panel, select Sync.
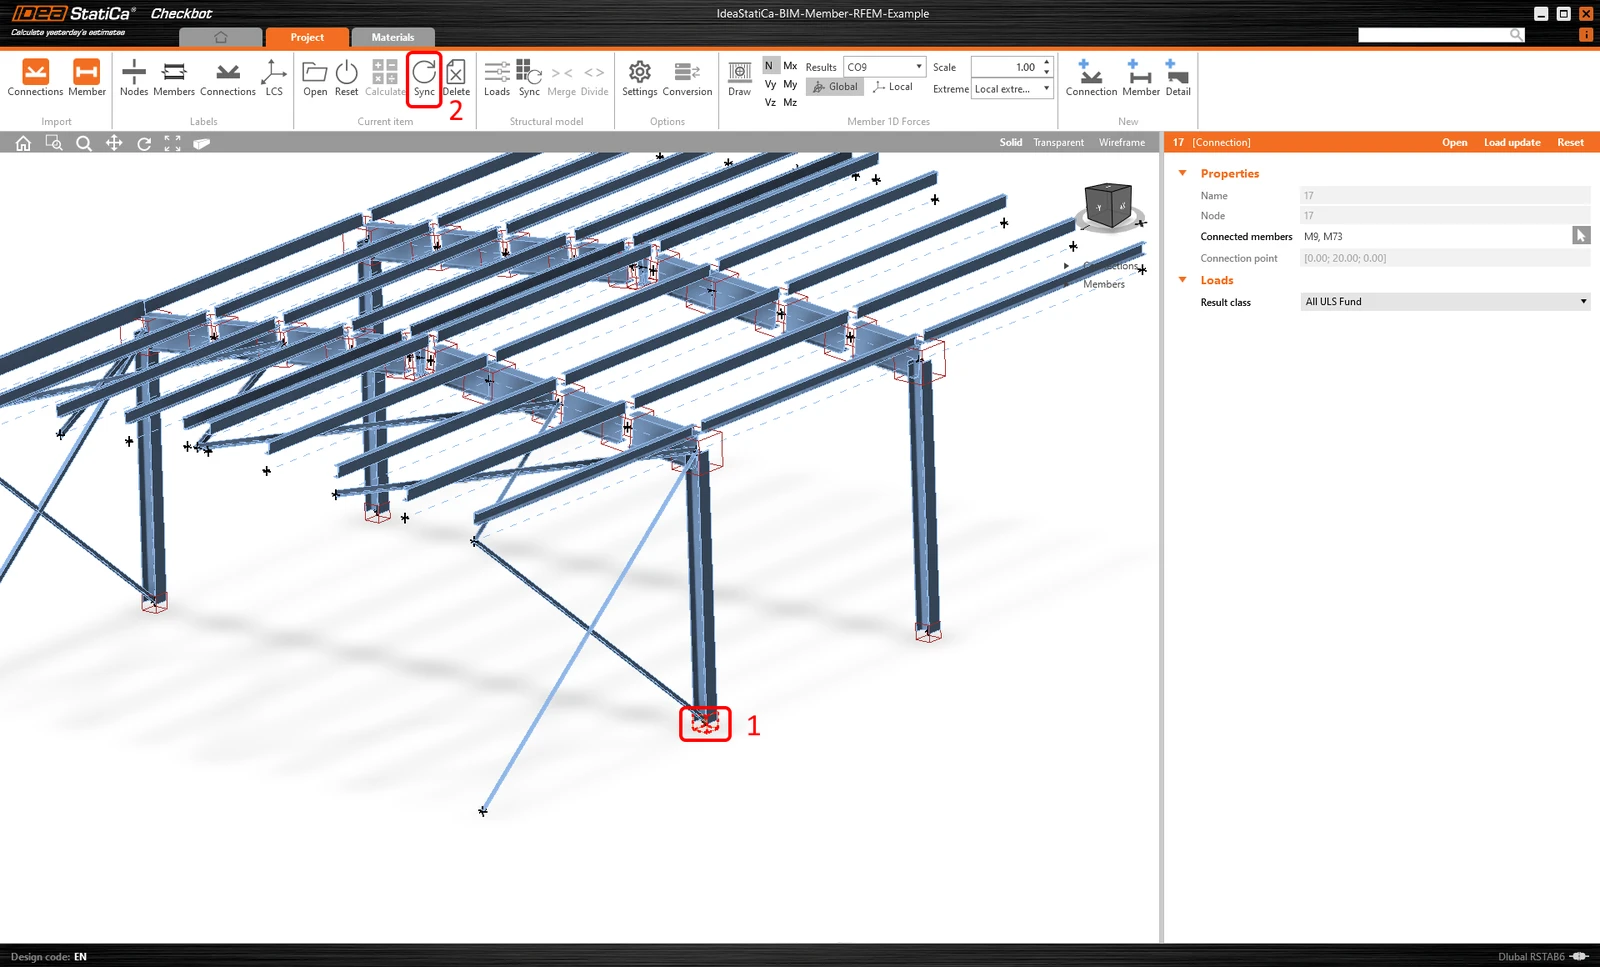
The Checkbot project will be updated, member (and connections) design is preserved, but the results will be invalidated. You can see that the column is now updated - matching the change in the FEA model.
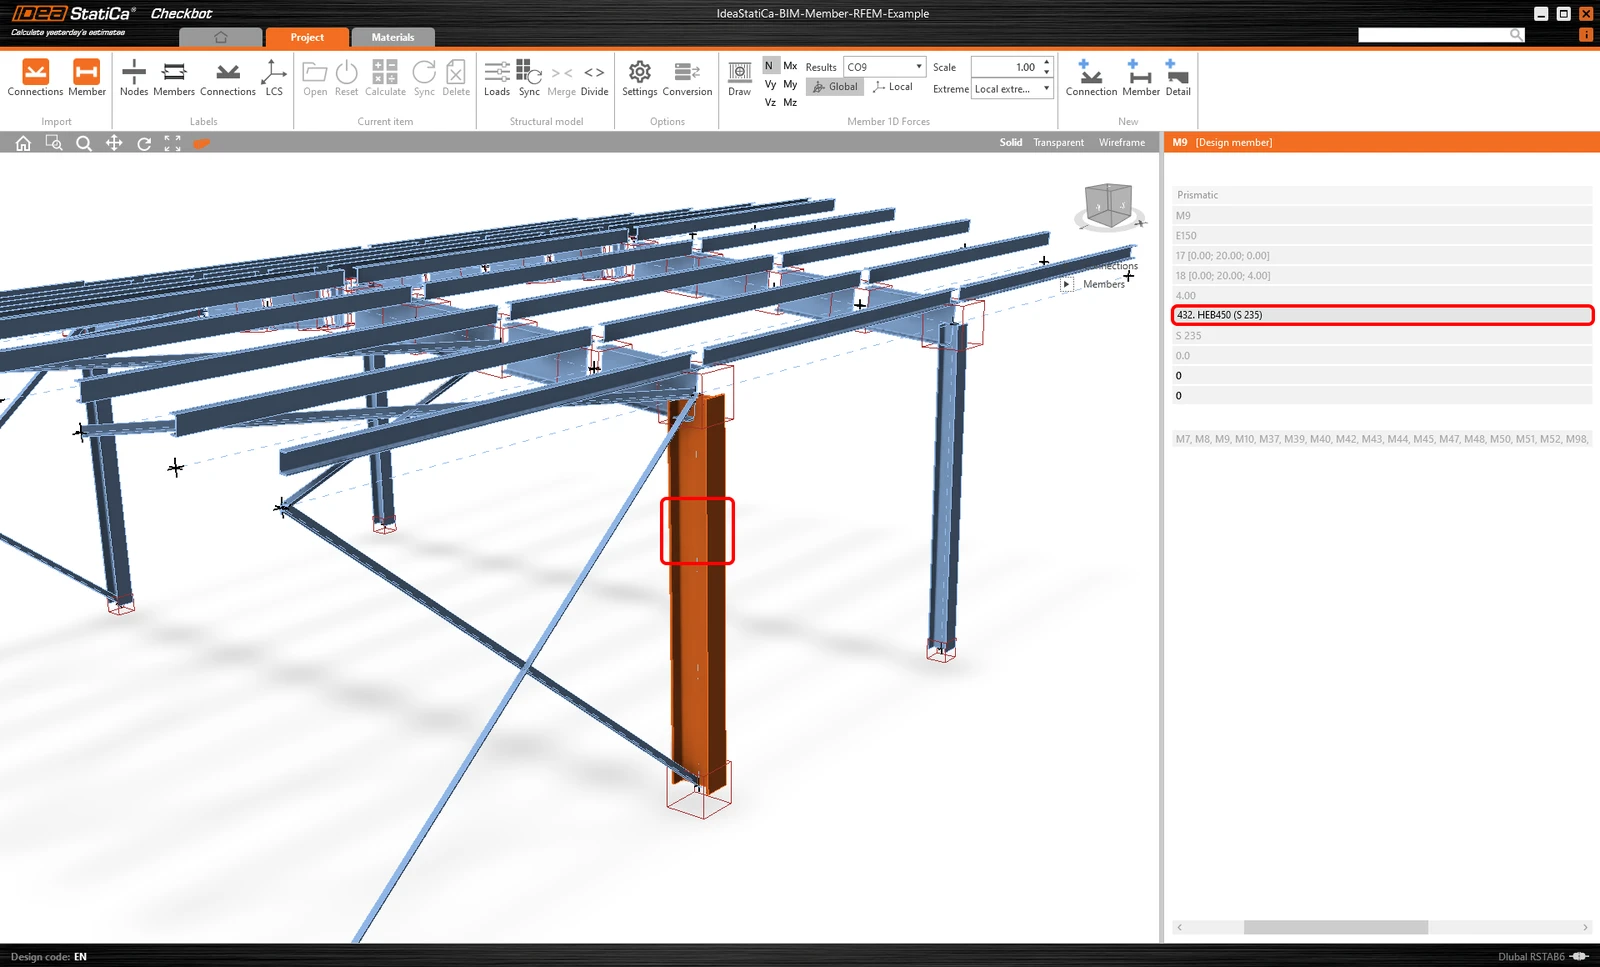
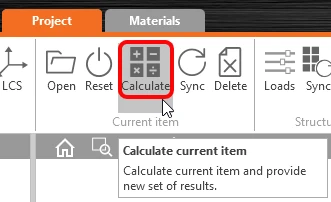
Simply code-check the highlighted member again by selecting Calculate from the Current item panel. Please remember that bigger changes in the model might require additional validation steps with the affected members (as above).
If the members do not give the desired results, then you can open them again to optimize the design (i.e. strengthen if they fail the code-check or lighten if the utilization is too low).
You have successfully linked Robot Structural Analysis with IDEA StatiCa Member via Checkbot.
Read more about the known limitations of the Robot Structural Analysis BIM link.